Windows Media Player holds a special place in the hearts of 90's kids. It was once our go-to music player when options were limited. At that time, there weren't many media players that we could use and download. However, with the emergence of numerous third-party media players, people gradually shifted away from using Windows Media Player.
Nonetheless, a considerable percentage of users still rely on this familiar tool to watch movies and listen to music. One limitation of Windows Media Player is its inability to play YouTube Music. If you're wondering how to add music from YouTube to Windows Media Player, this article will provide you with the answer.
Part 1. YouTube Music and Windows Media Player: Compatibility
When it comes to playing YouTube Music files on Windows Media Player, compatibility becomes an important consideration. Unfortunately, YouTube Music files are not directly compatible with Windows Media Player. There are a few limitations that you will learn in this section.
Firstly, YouTube Music files are protected and encrypted. This ensures that the content remains secure and prevents unauthorized distribution or usage. However, this encryption also restricts playback on certain media players, including Windows Media Player. If you have YouTube Music files that you would like to play in Windows Media Player, then convert YouTube Music to Windows Media Player-supported audio files first.
However, Windows Media Player supports specific file formats, which are listed below. These formats are widely used and offer broad compatibility with the player.
- Windows Media formats (.asf, .wma, .wmv, .wm)
- Windows Media Metafiles (.asx, .wax, .wvx, .wmx, .wpl)
- Microsoft Digital Video Recording (.dvr-ms)
- Windows Media Download Package (.wmd)
- Audio Visual Interleave (.avi)
- Moving Pictures Experts Group (.mpg, .mpeg, .m1v, .mp2, .mp3, .mpa, .mpe, .m3u)
- Musical Instrument Digital Interface (.mid, .midi, .rmi)
- Audio Interchange File Format (.aif, .aifc, .aiff)
- Sun Microsystems and NeXT (.au, .snd)
- Audio for Windows (.wav)
- CD Audio Track (.cda)
- Indeo Video Technology (.ivf)
- Windows Media Player Skins (.wmz, .wms)
- QuickTime Movie file (.mov)
- MP4 Audio file (.m4a)
- MP4 Video file (.mp4, .m4v, .mp4v, .3g2, .3gp2, .3gp, .3gpp)
- Windows audio file (.aac, .adt, .adts)
- MPEG-2 TS Video file (.m2ts)
- Free Lossless Audio Codec (.flac)
Part 2. How to Download YouTube Music to Windows Media Player - Tool Required
If you want to play YouTube Music files on Windows Media Player, you can consider using a converter. DRmare Audio Capture is a professional tool that allows you to record and download music from YouTube to Windows Media Player-compatible files with ease. This YouTube Music converter is pretty fast, which can download songs from any streaming platform within a matter of seconds.
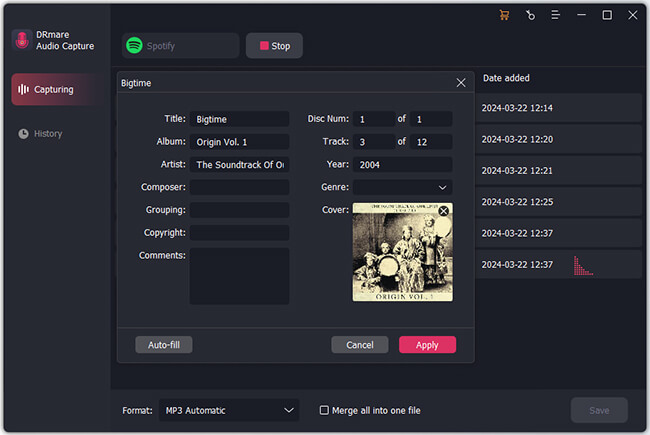
It will also help you record YouTube Music or other music without capturing any mouse-click sound. Moreover, it downloads the authentic ID3 tags of the sound you are recording. So, you can organize them more efficiently in your YouTube Music offline songs folder. And you can then move the local YouTube Music files to Windows Media Player or other platforms for use.
- Supports MP3, M4A, M4B, AAC, WAV, and FLAC output audio formats
- Supports to edit or trim YouTube Music songs with ease
- Supports to rip multiple YouTube Music songs at the same time
- Allows users to put YouTube Music on Windows Media Player or other platforms
How to Download Music from YouTube to Windows Media Player-supported Format
To download music to Windows Media Player from YouTube, follow these straightforward instructions to use DRmare Audio Capture.
- Step 1Start DRmare Audio Capture

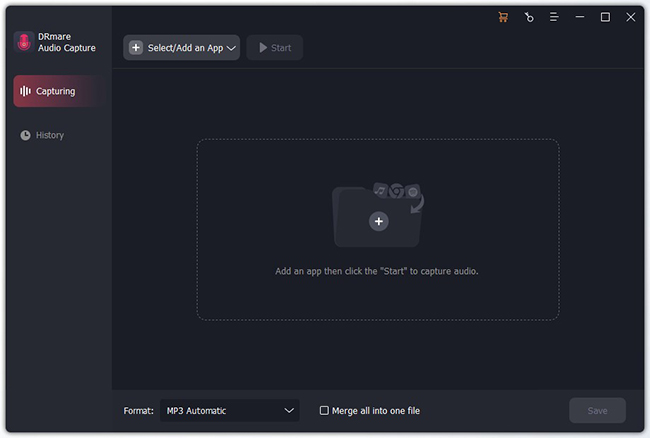
- Start by downloading and installing DRmare Audio Capture on your PC or MacBook. Afterward, open it and press the '+' icon to add a targeted platform for YouTube Music audio recording.
- Step 2Customize YouTube Music settings for Windows Media Player

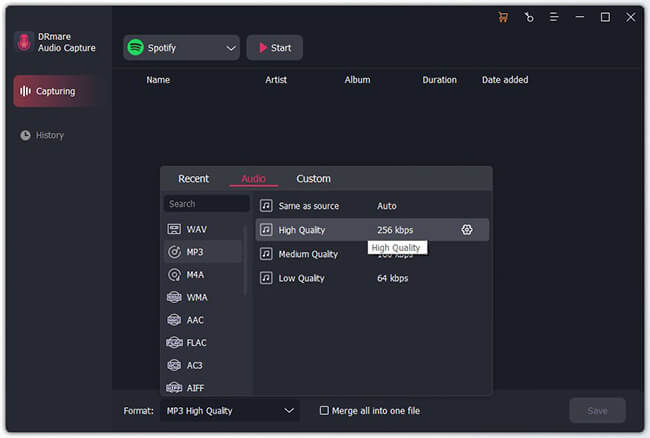
- Next, click on the 'Format' icon to access the output settings window. You can customize parameters like file format, sample rate, bit rate, and more for YouTube Music songs according to your preferences. Later, click the 'OK' button.
- Step 3Start playing YouTube Music tracks

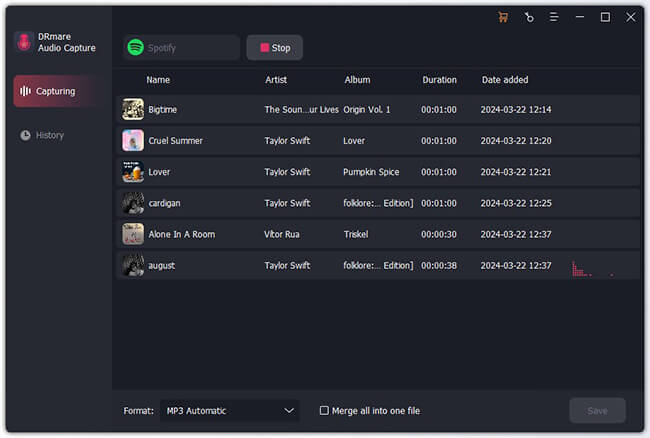
- Open the platform you want to play YouTube Music in the DRmare's main screen. Then head to select the music tracks you wish to capture. As you begin playing them, DRmare Audio Capture will automatically detect the audio and begin recording. Besides, the program will stop recording once the music concludes.
- Step 4Check local YouTube Music files on computer

- After recording, DRmare program will keep the tracks in its 'History' section. You can access your captured YouTube Music audio files from the designated 'History' menu. Then you can transfer and enjoy your saved YouTube Music tracks on your desired devices or platforms.
Part 3. How to Put Music from YouTube to Windows Media Player
With the WMP-supported format of YouTube Music songs, importing them into Windows Media Player (WMP) is easy. This section will discuss how to add music to Windows Media Player from YouTube. Please have a look at the detailed steps below.
Way 1. Open the Windows Media Player from your computer. Then drag and drop YouTube Music MP3 files directly into Windows Media Player from the target folder on your computer.
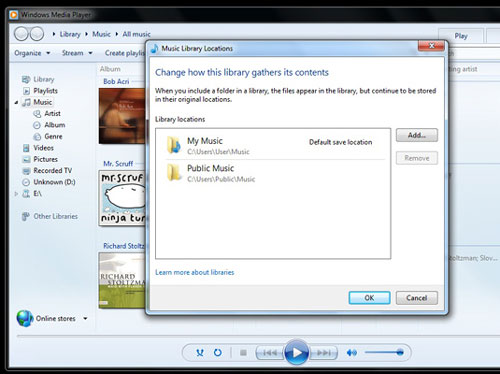
Way 2. Alternatively, you can open Windows Media Player and locate and select 'Library'. Afterward, go to 'Music' and select 'All music', locate the converted YouTube Music songs. In this way, you can easily transfer your YouTube Music tracks to Windows Media Player.
Part 4. How to Use YouTube Music in Windows Media Player
You've learned how to get music from YouTube to Windows Media Player. Now, you can make some customizations as well using YouTube Music tracks in WMP.
How to Burn YouTube Music to CD via Windows Media Player
Step 1. First, insert a blank CD or DVD into your computer's CD/DVD drive. Ensure that the drive is either CD-RW or DVD-RW, as these are writeable, necessary for burning information onto the disc.
Step 2. Then, open Windows Media Player on your computer and locate and click on the 'Burn' tab in the right pane of the program's interface. This action will display an empty burn list where you can add files.
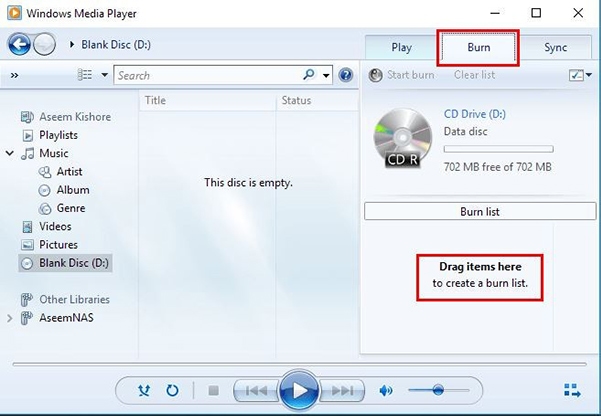
Step 3. Browse through your Library and locate the YouTube Music files you want to burn onto the disc. Simply drag and drop your downloaded YouTube Music files from your Library to the burn list in Windows Media Player.
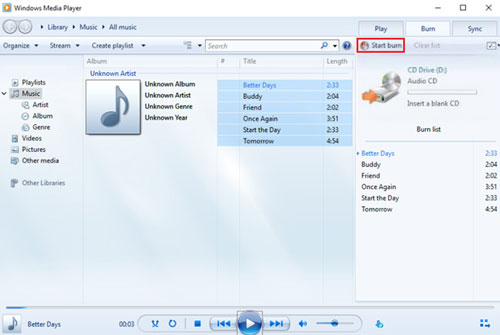
Step 4. Double-check the burn list to ensure all the desired files are present. Then, click the 'Start burn' option or a similar button to begin the burning process. Once the burn is complete, the CD or DVD will be automatically ejected from the drive, indicating that the process has finished.
How to Visualize YouTube Music in Windows Media Player
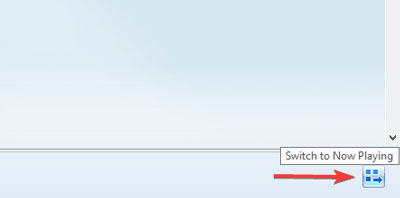
Step 1. Start the Windows Media Player from your PC. Once launched, click the 'Switch to Now Playing' button in the lower-right corner.
Step 2. Then, click 'Play' to start playing YouTube Music track you downloaded earlier.
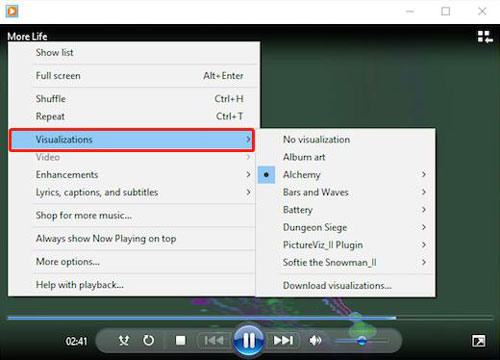
Step 3. Following this, right-click any open space on the media player and select 'Visualizations'. Next, highlight a collection category and click the visualization you want to use.
How to Trim YouTube Music through Windows Media Player
Step 1. Download and install the WMP Trimmer plug-in from the official website. Open Windows Media Player, click 'Tools', and then select 'Plug-ins' from the options. After that, select 'SolveigMM WMP Trimmer Plugin' to activate it.

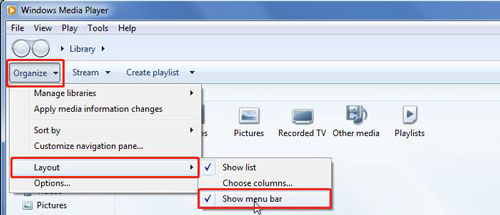
If you can't find the 'Tools' option, go to the player library section, and click 'Organize'. From the options, go to 'Layout' and select 'Show Menu Bar' to display all tools.
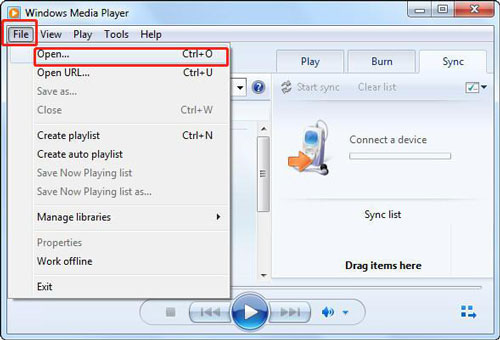
Step 2. Next, click on 'File' and choose 'Open...' from the options. Otherwise, click the 'Open Media File' button in the WMP Trimmer Plug-in to select and open the YouTube Music file you want to trim. Proceed to click the 'Edit File' button to view the expanded plug-in.
Step 3. After that, drag the slider to the desired beginning point of the fragment you want to save. After that, click the 'Add marker' button and move the slider to the endpoint of the fragment you want to save. Then, press the 'Add marker' option again.
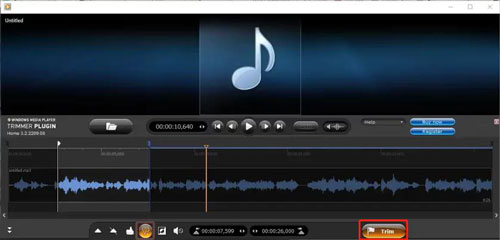
Step 4. Adjust the slider to select the desired section of your YouTube Music file. Proceed further by clicking the 'Keep Selected Fragments' and 'Invert Time Line Fragments' buttons. It will highlight the section of your YouTube Music file you want to save. Next, click the 'Trim' button and rename the file. Lastly, choose an output folder, and click 'Save' to save the trimmed version of your YouTube Music file.
Part 5. Conclusion
YouTube Music has become a popular platform, attracting millions of users daily. However, the challenge arises when you want to play YouTube Music on your trusted Windows Media Player. In this case, you need a YouTube Music converter to Windows Media Player to overcome this limitation. Here DRmare Audio Capture is one such recorder and converter that allows you to convert YouTube Music to common audio files so you can play them on Windows Media Player easily.




User Comments
Leave a Comment