In the music world, there exists a technique known as crossfading. And as the name suggests, crossfading involves fading out of one song while simultaneously starting another, creating a blend between tracks. DJs and audiophiles enjoy this feature to create a magical and smooth listening experience.
Having said that, most music fans wonder 'does YouTube Music have crossfade'. Unfortunately, most popular music platforms do not offer the Crossfade feature including the YouTube Music. But worry not, in this article, we will explore an alternate method to help you crossfade YouTube Music and enhance your YouTube Music experience with seamless transitions. So, what are you waiting for? Let's take a look.
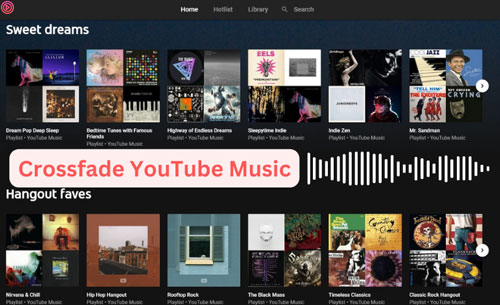
Part 1. How to Crossfade YouTube Music - Tool Needed
As mentioned earlier, it is not possible to crossfade on YouTube Music directly. However, third party tools can help you. If you're unsure where to find a reliable tool, look no further than DRmare Audio Capture.
Designed with a user-friendly interface, this powerful tool provides a comprehensive solution for capturing and saving audio played on your computer, including your favorite YouTube Music. DRmare Audio Capture records high-quality audio and converts it into popular audio file formats such as MP3, M4A, M4B, FLAC, and more for better compatibility. Moreover, the audio recording process is 100% lossless. So, whether you capture songs from YouTube Music or other sources, the tool will not compromise the original audio quality.
That's not all, DRmare's powerful recording technology allows you to batch record multiple songs and playlists in one go, saving your time and effort. Additionally, it offers a suite of editing features such as trim, cut, duplicate, and merge the recorded songs before downloading them to your computer. Then you can transfer local YouTube Music files to other platforms or devices for use without any restrictions.
- Capture multiple soundtracks from different sources simultaneously
- Record 100% original audio quality of YouTube Music tracks after recording
- Keep music track of original metadata like title, artist, and so on
- Support to customize the audio with several editing options
Part 2. How to Record and Convert YouTube Music for Crossfade
Understanding how to crossfade in YouTube Music can open a new world of music enjoyment. With the help of DRmare Audio Capture, this process becomes easy even for beginners. Here is a step-by-step guide on how to record and convert YouTube Music songs for crossfading. Check it out now.
Step 1. First, install DRmare Audio Capture on your computer from its official website and then launch it. Next, click the '+' button to add the app from where you like to rip YouTube Music.
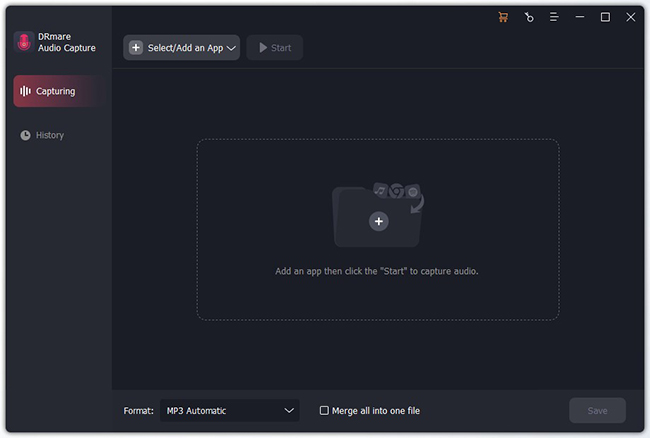
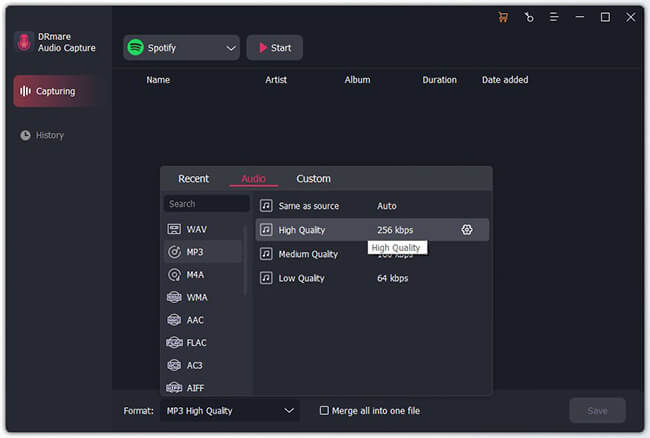
Step 2. On the next step, you need to adjust the output audio parameters for YouTube Music songs. DRmare Audio Capture supports formats such as MP3, M4A, AAC, WAV, M4B and FLAC. To select your desired format, go to the Settings window and click the 'format' dropdown. You can also customize your output YouTube Music by adjusting codec, bit rate, sample rate, and channel based on your needs. After that, you need to touch the 'OK' option.
Step 3. After the settings, play a song or playlist you want to record from the target platform. Later, DRmare will detect and start recording audio from YouTube Music immediately.
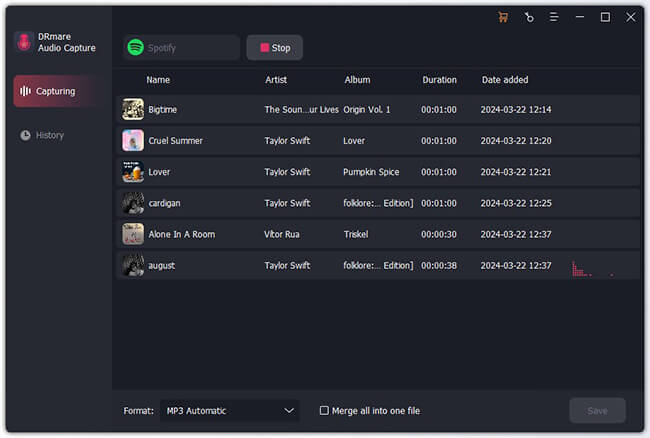
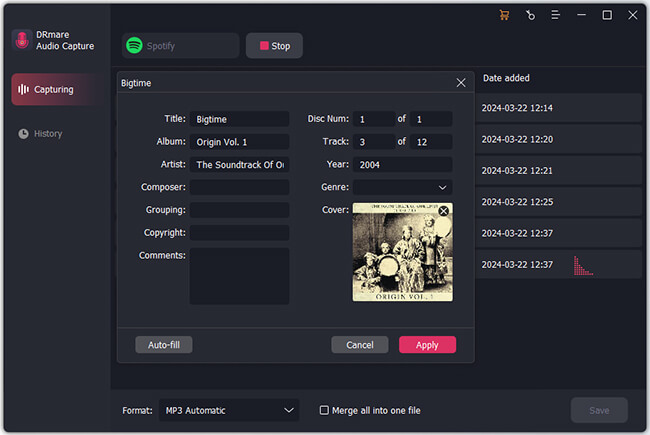
Step 4. When the song ends, the recording will automatically stop. Now, hover your mouse over the recorded audio file and click the Edit icon to trim, duplicate, or merge.
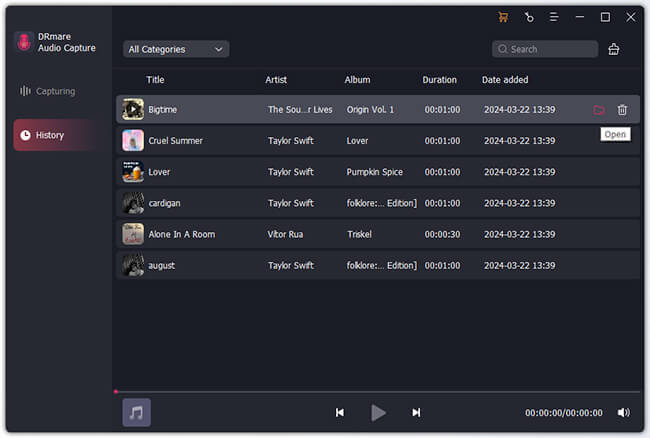
Step 5. In the end, press the Save button to keep the captured YouTube Music audio files on your computer. If you want to locate a specific song within your computer's folders, tap the history icon and then click the Search icon.
Part 3. How to Crossfade on YouTube Music
Now that we've captured and downloaded songs from YouTube Music, it's time to take it to the next level. Let's learn how to add YouTube Music to Spotify and enjoy a seamless crossfade experience as there is a Crossfade feature on Spotify.
Section 1. Add YouTube Music files to Spotify
Step 1.Open the Spotify desktop application.

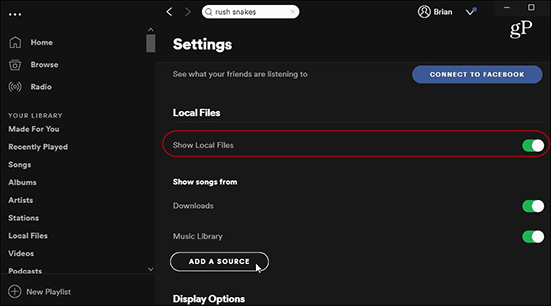
Step 2. Look for your profile name at the top-right corner of the interface and click on the downward arrow. From there, select 'Settings'. As you scroll down, locate the 'Local Files' section. Activate it by switching the toggle to 'On'. To proceed further, click on 'Add a source'.
Step 3. A new window will appear. Browse your computer files until you find the folder where your YouTube Music files are stored. Select this folder and click 'Open'. Once completed, you'll notice that your chosen folder appears in Spotify's 'Local Files' section.
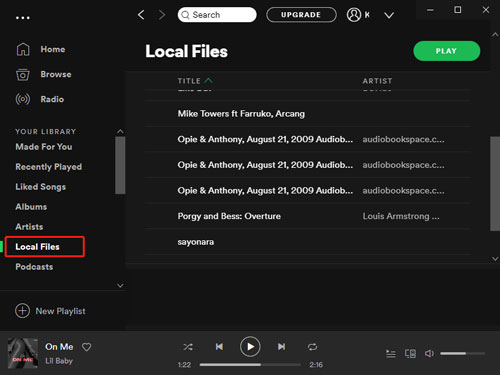
Step 4. Head to the 'Your Library' section within Spotify and press 'Create Playlist'. Give your playlist a unique name according to your preference, and revisit the 'Local Files' section mentioned earlier. Then just right-click on any song of your choice and select 'Add to Playlist’, then select - [Your Playlist Name].
There you go. You've successfully added your favorite YouTube Music to Spotify!
Section 2. Crossfade YouTube Music via Spotify
Once you have your YouTube Music songs on Spotify, you can utilize Spotify's built-in crossfade feature to ensure seamless transitions between songs. Here's how.
Step 1. On the Spotify app, click the downward arrow next to your profile name in the top-right corner and select 'Settings’.
Step 2. Scroll down until you see the 'Playback' section. Here, you will find the 'Crossfade songs' feature.
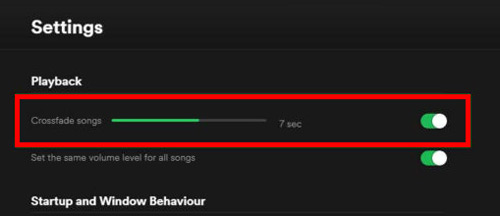
Step 3. Click on the bar next to 'Crossfade songs'. You can now adjust the length of the crossfade. The distance can be set between 0 to 12 seconds.
Step 4. Finally, go back to your playlist, play your favorite music from YouTube Music and observe the seamless transition between tracks.
Part 4. In Conclusion
Crossfading is trending in the modern music era. Audiophiles want to crossfade their favorite music from different streaming platforms to create extraordinary music mixes. Fortunately, mastering the art of YouTube Music crossfade isn't a complex task now. It's all about learning the steps and using the right tools. With DRmare Audio Capture, even beginners can easily record, convert, and transfer YouTube Music tracks to Spotify for crossfading. This process gives you more control over your music. The world of seamless music transitions is just a few clicks away.


User Comments
Leave a Comment