Swimming among the giants is the Tidal music streaming service. Even though it is best known for hi-res and high-quality sound, many people still want to know more about Tidal. Issues like the cost and how to carry on with your account after subscription are concerns that Tidal lovers continue to ask.
Well, that is what we intend to unleash in this Tidal review piece. Having gotten into the music arena way back in 2014, it has tagged along both the good and fair points as far as music is concerned. Dive into the next section for more insights.
Part 1. What Is Tidal
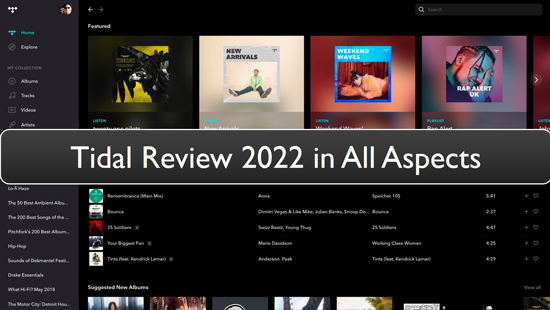
Tidal is a music streaming service that offers you over 110 million tracks. It also carries about 350,000 videos from assorted artists in the market. Tidal has been at the forefront of supporting artists and by this, it offers an open avenue via which its subscribers directly support artists.
Part 2. What Is the Price Plans of Tidal
This music streaming service has two plans available. Firstly, is the HiFi plan that offers CD quality audio, going up to 1,411 kbps. You need to part with $9.99 per month as you get access to Tidal Connect and offline listening.
The second is the HiFi Plus plan with ad-free service, Tidal Connect, offline listening, Master Quality Audio recordings as well as innovative formats like Tidal Dolby Atmos. This plan also uses 10 percent of your subscription to the artists you mostly listen to. It costs $19.99 per month.

Part 3. Tidal Sound Quality Review
When it comes to Tidal sound quality review, it has much focus on its sound quality, offering three subscription tiers. You can access Tidal Premium, Master quality, and HiFi Plus plans. The Tidal Premium gives you two audio quality settings. That's the "Normal" at 96 kbps and "High" at 320 kbps. These stream your music tracks in the AAC format. Likewise, Tidal HiFi has additional two audio settings which are the HiFi at 1,411 kbps and Master which ranges from 2,304 to 9,216 kbps.
Part 4. How to Subscribe to Tidal Plans
Once you decide which Tidal plans to go for, the next step is to subscribe to it and get down to the full usage. Follow these steps.
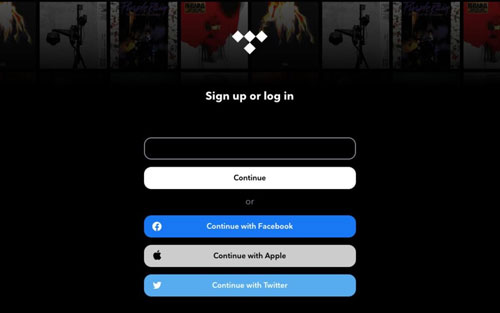
Step 1. Visit the "Tidal.com" website to sign up. You can also install the "Tidal Music app" from your phone's App Store.
Step 2. Go to the "Start Free Trial" tab on the side to begin the signing up process.
Step 3. Then enter your email address that is used for your account. Likewise, you can sign up with your Facebook account. To do so, just tap the "Continue with Facebook" option and proceed to sign up.
Step 4. Now create a password that you'll use for your new Tidal account.
Step 5. Now you got to select your plan to use with your free trial. Choose between Premium and HiFi plans then select options for family, student, among others that Tidal offers.
Step 6. Finally, enter your payment information. You can either pay from your PayPal account or use a credit card. Viola! You just subscribed to Tidal.
Note: Tidal doesn't bill you until the 30-day free trial is over.
Part 5. How to Cancel Tidal Subscription
If you don't want to continue subscribing to Tidal, then you can check out how to cancel Tidal subscription in detail below. Here are 5 ways for you to make it.
Via Tidal Website
Step 1. First, open the "Tidal" website in your browser, then log in to your Tidal account.
Step 2. Go to the top-left of the screen and click on your account icon, then choose the "Manage Subscription" option.
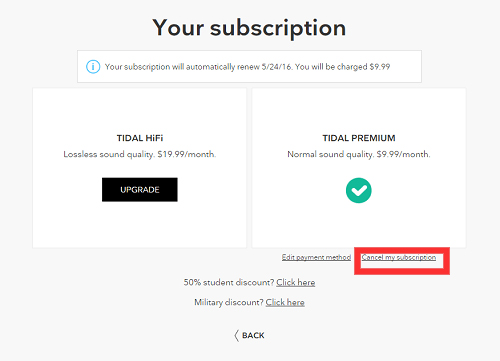
Step 3. Click on the "Subscription" tab > "Your Subscription" page and click on the "Cancel my subscription" button to cancel the subscription.
On Tidal Android App
Step 1. Start the Tidal app on your Android device.
Step 2. Click on "My Collection" option found at the bottom-right of the screen.
Step 3. Then go to the "Settings" icon and click on it.
Step 4. Your account icon should appear at the top of the screen. Tap on it, then go to the "Manage Subscription" section. The app should then allow you open a mobile version of the Tidal website.
Step 5. Then click on the "Subscription" option and finally tap the "Cancel My Subscription" option to cancel it.
By Sprint
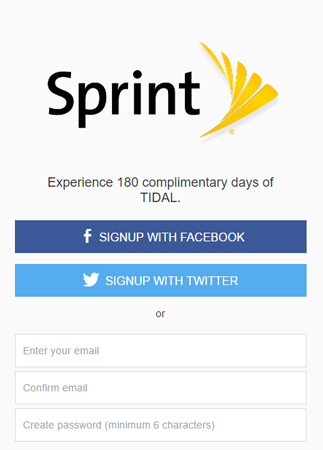
This guide is for Tidal X Sprint subscribers who use Tidal with Sprint.
Step 1. Go to the official website of "Sprint".
Step 2. Then log in to your account through the Sprint website.
Step 3. Next, open the "My Sprint".
Step 4. Finally, contact the Sprint customer service to assist you to cancel your Tidal subscription.
Via Mobile Carrier
You might also have subscribed using your cellphone mobile carrier and now wish to cancel Tidal subscription. To do so, simply contact the customer service department of your mobile carrier. They can either cancel the subscription from their end or give you instructions how to cancel it right from your mobile device.
On Apple and iTunes Wallet
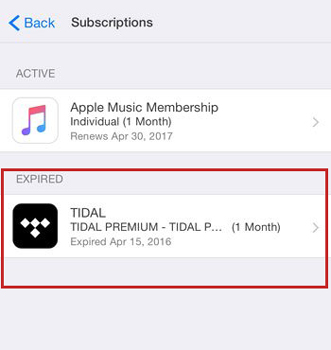
Step 1. Go to your Apple Wallet using any browser and open the "Settings" app. Then tap on your name and go to the "Subscriptions" section.
Step 2. Next, choose the specific subscription that you want to manage.
Step 3. Finally, click on the "Cancel Subscription" tab to accomplish your mission.
Part 6. How to Delete a Tidal Account
You don't have to keep your Tidal account forever. Here is the guide if you wish to delete your Tidal account at any time.
Using Email
Step 1. Go to your "gmail account" and click on the "Compose" tab.
Step 2. Indicate "Request to delete my Tidal account" in the subject section.
Step 3. Type in [email protected] in the "TO" section. That's the recipient address.

Step 4. Use the "Body" section to enter in all reasons for you wanting to close your account.
Step 5. Click on the "Send" button to send your composed mail to the Tidal support team. Wait as they review and remove your account as per your request.
Via Tidal Website
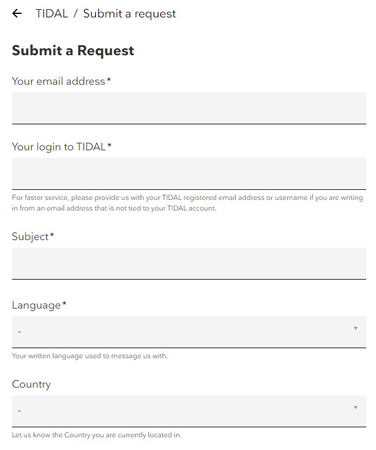
Here are the steps to submit a request through Tidal website for account deletion.
Step 1. First, go to the https://support.tidal.com/hc/en-us/requests/new tab.
Step 2. Submit your details as well. These include your name and email address.
Step 3. Type "Delete my account" in the subject field.
Step 4. Go to the "Country" section and type your country's name.
Step 5. Then enter your device in the "Device operating system" section.
Step 6. Finally, request them to now delete your account in the "Tell us more" section. Remember to give all the information about your account.
Step 7. Finally, click the "Submit" button to finish up the request process.
Part 7. How to Enjoy Tidal Music without a Tidal Account
Above is the Tidal app review for your reference, including its price plans, sound quality and so on. By the way, you may sometimes wish to enjoy Tidal music after ending your subscription. The best tool, DRmare Tidal Music Converter makes it possible once you download and convert your Tidal music.
This is a reliable Tidal music downloader and converter that will effectively control the playback of your Tidal music tracks. It saves your favorite Tidal music in common output formats like WAV, MP3, and many more. It also enables streaming of high quality music as it will retain all the metadata and ID3 tags of the original music tracks. You can also customize the parameters for your Tidal audio tracks like audio channel and bit rate.
The conversion speed of DRmare is at an advanced level. It works at up to 5X rate enabling batch conversion within a short time. More so, you can manage the output music library and sort them out by artist or album.

- Keep original quality of the original Tidal music tracks
- Convert Tidal songs at a 5X speed with ease
- Support to organize your music library by artist or album
- Customize output format and parameters for Tidal tracks
How to Download and Play Tidal Music Offline with Ease via DRmare Tidal Music Converter
Visit the DRmare Tidal Music Converter webpage and click on the "Download" button. Once you install and launch the converter on your computer, you'll notice it will open the Tidal app you installed. Otherwise, you will be asked to install the Tidal music app first to use the DRmare program.
- Step 1Customize Tidal output format
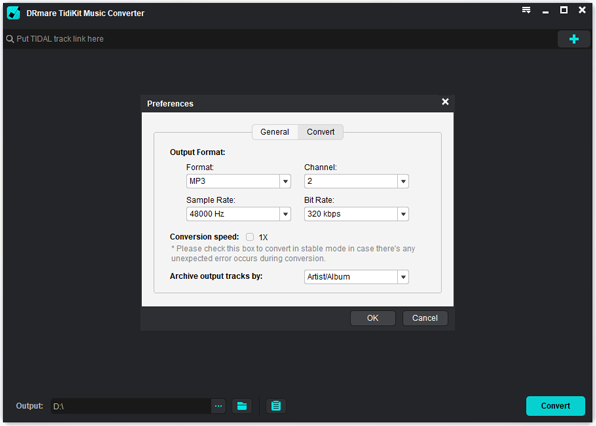
- Click on the "Preferences" > "Convert" option and start to adjust the output format of Tidal to MP3 or other audio formats you like. Then proceed to customize the parameters such as channel, sample rate, audio codec, etc. for Tidal songs. DRmare also lets you to classify Tidal songs by album or artist. Just click on the "Archive output tracks by" button to do so, then click on the "OK" button to confirm the settings.
- Step 2Add Tidal music to DRmare
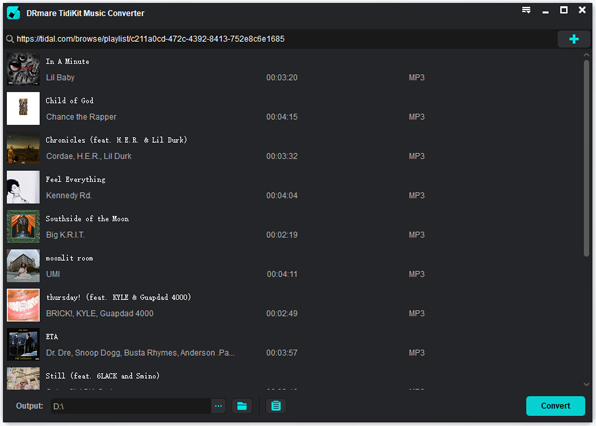
- Go to Tidal music application to search for the Tidal tracks to add to the interface. Once found, click on the three dots icon next to the track's title. Then choose 'Share' > 'Copy Track Link' to get its link address. And then put it onto the search bar on DRmare program and hit on the '+' icon. The Tidal music files will be added into DRmare for converting.
- Step 3Download and convert Tidal songs
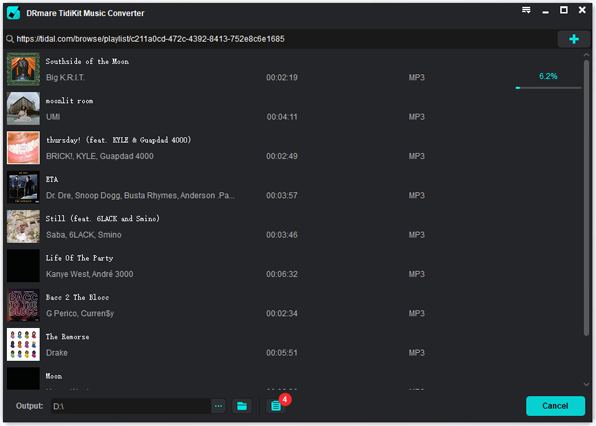
- Now click on the "Convert" button and DRmare will begin to convert and download Tidal music for offline playback. The converted Tidal will then be saved as common audio files you set. After conversion, you can use the Tidal music on any device without a Tidal account and subscription.
Part 8. Conclusion
Tidal music streaming service is an after-sought app with quality and hi-res output music. You can subscribe and cancel the subscription at any time. This Tidal music review has covered how to cancel and delete a Tidal account in several ways. However, you can also get your music without a subscription by using DRmare Tidal Music Converter. The steps are easy and the process is painless. After that, you can get the local audio files from Tidal and then you can play Tidal music offline anywhere and anytime.


User Comments
Leave a Comment