Facebook is arguably the best social media platform to stay connected with friends and family members. This platform has allowed us to search for people, send friend requests, and start chatting with them. Basically, Facebook has made our lives easy. And just like Facebook has made it easy to stay connected with people, Tidal, a music streaming platform, has made it convenient for us to listen to our favourite songs on the go.
Tidal has more than 110 million songs and what many Facebook users do is connecting their Tidal account with Facebook. That way, they don't need to create a new account for Tidal and directly link their Facebook account to Tidal. However, when you link Tidal Facebook, Tidal receives a lot of your personal information. And this is the reason why so many users are now looking for a way to unlink Facebook Tidal. So, if you want to disconnect Tidal from Facebook, we will tell you two easy ways to do that. Keep reading.
Part 1. How to Disconnect Tidal Facebook Account on Computer/Mobile
If you want to unlink your Facebook Tidal account, this is the first method to try. Follow the steps carefully and remove or change Tidal account on Facebook.
Step 1: Open Facebook on a web browser or mobile app.
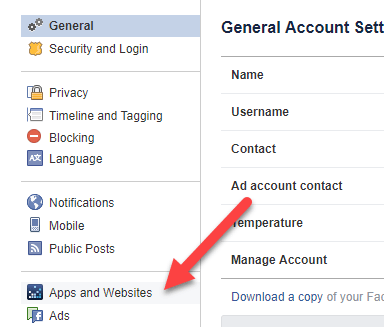
Step 2: Now, select the Settings option. Once done, you need to click on the Apps and Websites option.
Step 3: When the Apps and Website page appears, browse through all the apps and look for Tidal. You will see an option right under the name of the app, which is View and Edit.
Step 4: Click on the Edit option and then hit the remove option to remove the app from your Facebook account.
Part 2. How to Unlink Your Facebook from Tidal on Mobile/Desktop
Just like you connect Tidal to Facebook account, you can disconnect it from your Tidal account too. Tidal allows you to disconnect it from the app itself. So, the benefit of using a Facebook account for the Tidal login account is that you don't have to log in by adding your credentials over and over again. You can just log in by clicking on the Facebook option, and that's it.
But if you no longer want to keep your Facebook account connected to Tidal, here are the steps that you need to follow to remove the connection.
Step 1: Launch a browser and go to my.tidal.com.
Step 2: Login and then go to the My Collection option.
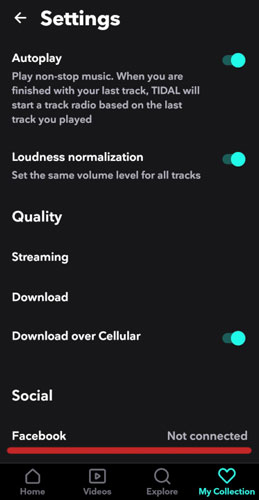
Step 3: Once there, you need to click on the Settings option.
Step 4: Scroll down until you see the Connect option.
Step 5: You will see Facebook as connected. You need to toggle it to disconnect Facebook from Tidal.
Part 3. How to Save Tidal Music from Old Facebook Tidal Account
You may want to unlink your Facebook Tidal account for multiple reasons. But no matter what the reason is, do you know that there is an easy way to listen to Tidal songs? The solution that we will share will let you play Tidal songs on any device you want. So, why now download all the Tidal songs and play them offline rather than login into a Facebook account? By using a professional and robust Tidal music downloader, you can download all the songs and play them on any device you want.
The recommended tool to go for is DRmare Tidal Music Converter. This is a professional tool, and its easy-to-understand interface makes it one of the best Tidal music converter and downloader tools. Using it is easy because there are just a few steps that you need to follow.
DRmare Tidal Music Converter can convert Tidal songs into FLAC and multiple audio formats, such as MP3, AAC, and more at 5X speed, which means the waiting period will be less. You can download DRmare Tidal Music Converter on both your Mac and Windows computers. Just click on the correct version and download it before you start using it.

- Available for both Mac & Windows computers
- An easy-to-use tool and can download songs at 5X speed
- Convert songs into multiple audio formats
- Listen to Tidal music offline on multiple devices and players
How to Use DRmare Tidal Music Converter
Before learning the steps, ensure that you download and install DRmare Tidal Music Converter on your computer. Then follow these steps.
- Step 1Launch DRmare Tidal Music Converter and set audio parameters
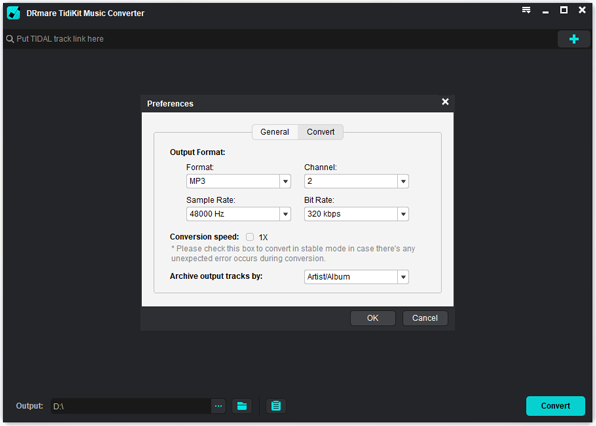
- Once DRmare Tidal Music Converter is launched, please click on the Preferences option. Then, click on the Advanced option and set the audio parameters. For example, you can change the output format, sample rate, output audio quality, audio channel, and bit rate. Once done, go to the next step.
- Step 2Add the Tidal music songs to DRmare
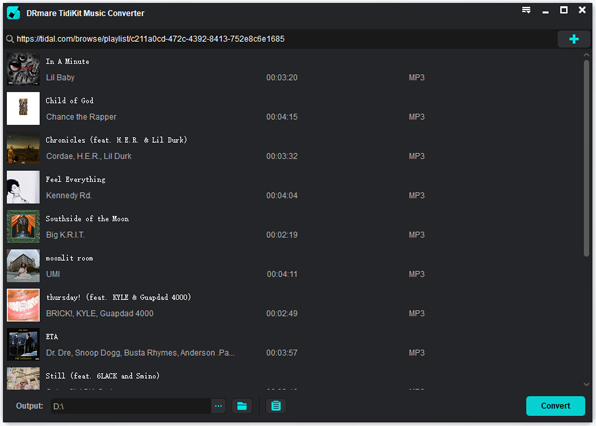
- Go to Tidal web player in DRmare and find the songs that you want to convert and download. DRmare Tidal Music Converter will first convert the songs to the chosen audio format and then download them. You can add one playlist with multiple songs to convert. After that, it's up to you. Once you are done, you need to click on the Convert option.
- Step 3Download Tidal songs to listen to offline
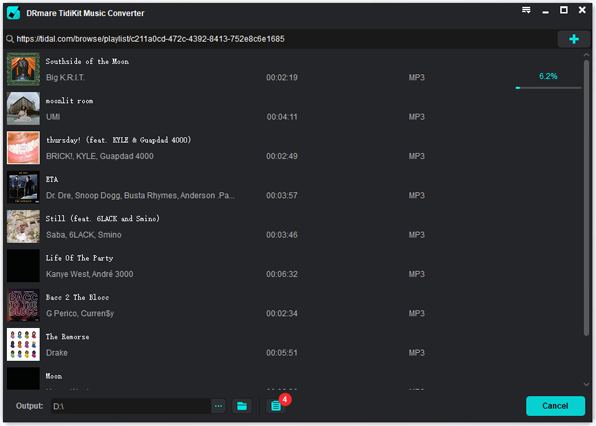
- After clicking on the Convert option, the songs will begin to get converted at 5X speed. Once the songs are converted, you can locate them in the Converted icon. Additionally, you will find where the songs are downloaded as a local file on your computer.
Part 4. Conclusion
Now you know how to unlink Tidal Facebook. You can disconnect Facebook from Tidal by following part one, or if you want to remove Facebook from Tidal from your Tidal account, you can try part two. Both the options will let you remove Facebook Tidal account. Also, if you want to listen to the Tidal songs offline and on any device you want, you can download DRmare Tidal Music Converter and start to download and listen to the songs on the go. To download, choose the correct version, and that's about it.


User Comments
Leave a Comment