Switching music streaming services can feel like moving to a new house: exciting yet somewhat daunting, especially when you’ve spent countless hours curating playlists that you don’t want to lose. Fear not! To transfer your Spotify playlists to YouTube Music in 2024 is easier than ever. In this guide, I'll introduce you to four of the best Spotify to YouTube Music playlists converters I’ve successfully tried myself to help you convert Spotify Playlist to YouTube Music seamlessly. Whether you prefer free or paid options, there's a solution here to help you move from Spotify playlist to YouTube playlist. Additionally, sometimes when transferring Spotify playlist to YouTube Music, there would be some missing tracks, we will discuss how to solve this problem with DRmare Spotify Music Converter.
Part 1. How to Transfer Spotify Playlist to YouTube Music with TuneMyMusic
TuneMyMusic is a online platform to help you to transfer playlists between a multitude of music streaming services.
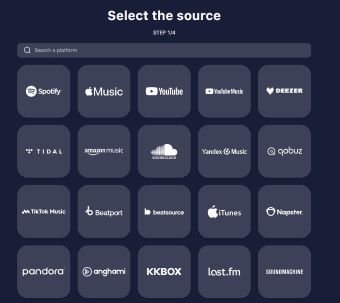
Compared to other converters, TuneMyMusic boasts a more intuitive interface. Since it’s an online platform, it’s also very convenient to access.
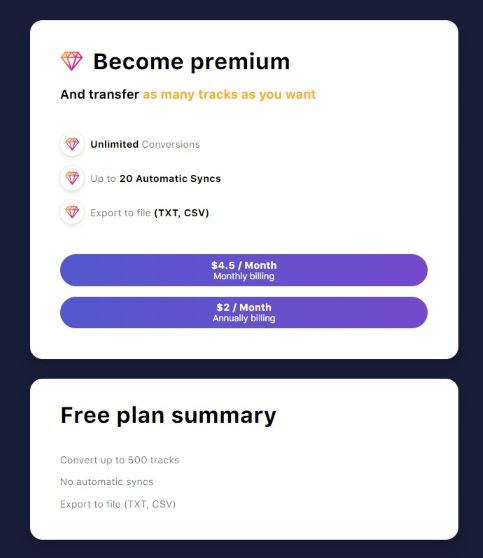
TuneMyMusic offers a free plan that allows users to transfer up to 500 tracks. If you want to transfer more tracks from Spotify playlists to YouTube Music, you’ll need to upgrade to a Premium plan, which includes a $4.50/month option and a $24/year option. The Premium plan allows you to convert unlimited Spotify playlists, tracks, and albums to YouTube Music. Additionally, Premium account holders can enjoy up to 20 automatically synced playlists and export their playlists into CSV, TXT files.
Importing Spotify playlist to YouTube Music with TuneMyMusic is a straightforward process, you can reference the following steps to do it:
Step 1. Go to the official website of TuneMyMusic.
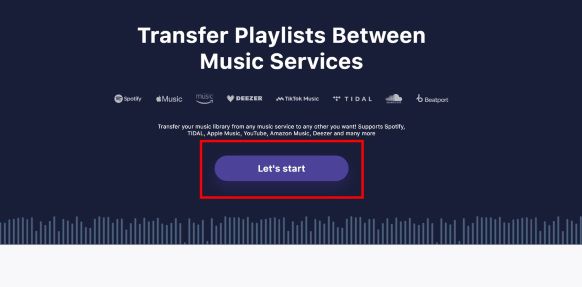
Step 2. Click “Let’s start” in the center.
Step 3. Then choose Spotify as your source streaming service to import playlists from.
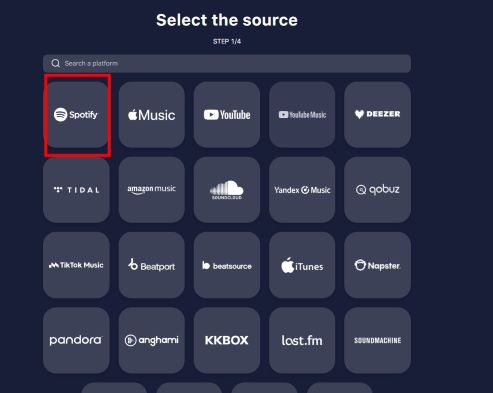
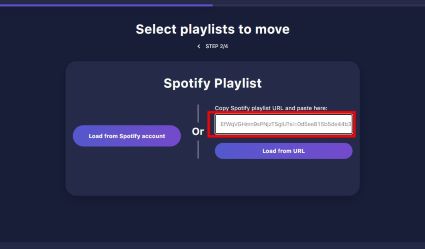
Step 4. Next, copy the links of the playlists you want to import from Spotify, and paste it into this input bar on TuneMyMusic. Hit “Load from URL”.
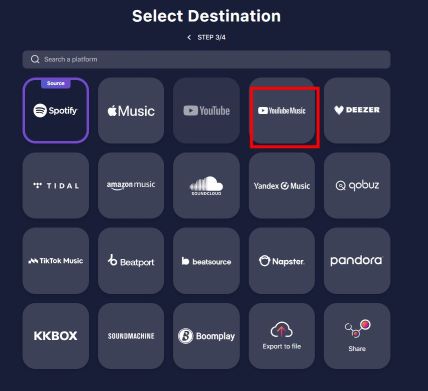
Step 5. Click “Choose Destination” to choose YouTube Music to transfer your Spotify playlists to.
Step 6. Hit “Start Transfer”, and the process will begin immediately, usually it’s very fast and the whole process would only take a few seconds.
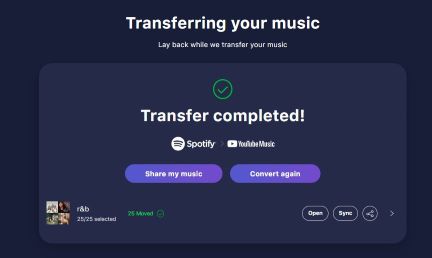
After transferring, you can hit “Sync” in the bottom right if you have a Premium subscription.
It's not entirely clear whether the limitations set by TuneMyMusic apply per streaming service account or per TuneMyMusic account. If it's the latter, you might be able to bypass this limitation by signing up with different TuneMyMusic accounts and transferring your Spotify playlist to YouTube Music using these different accounts freely. However, I don't have enough tracks in my playlists to test this workaround. If you hit the limit while transferring, you might want to give this method a try.
Additionally, I noticed that initially, I wasn’t asked to log in before converting playlists between streaming services. I was still able to transfer my Spotify playlists to YouTube Music successfully. This suggests there might be different limitations for guest users and logged-in users, which TuneMyMusic hasn’t clearly announced. You might want to take advantage of this as well.
Pros and cons of transferring playlist from Spotify to YouTube Music with TuneMyMusic
Pros
-
 Intuitive interface
-
 Fast transfer speed
-
 Easy to access
Cons
-
 Maximum number of songs to convert for a free user is relatively low.
-
 Can only convert one playlist at a time.
Part 2. How to Convert Spotify Playlist to YouTube Music with Soundiiz
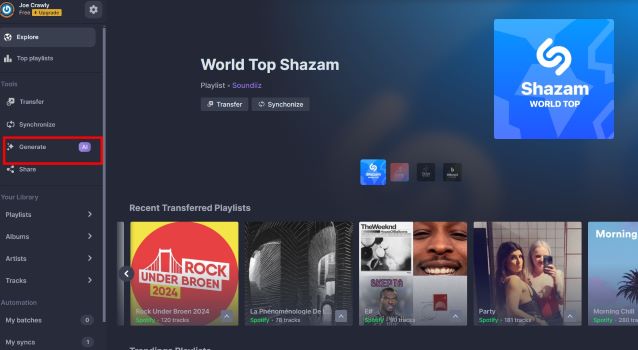
Soundiiz is another online platform that helps you import Spotify playlists to YouTube Music, so it’s easy to access as well. And Soundiiz provides more features compared to other Spotify to YouTube playlist converter. For example, it includes an AI feature that helps you quickly build playlists that adhere to the music style you specify.
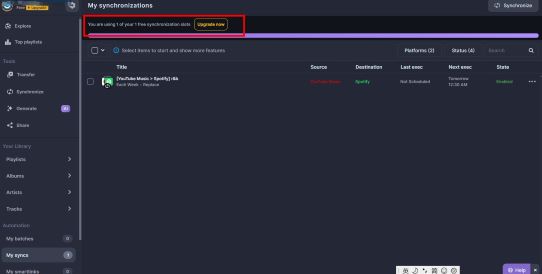
And Soundiiz is the only service that allow you to sync playlist with free account, although it’s limited to 1 playlist.
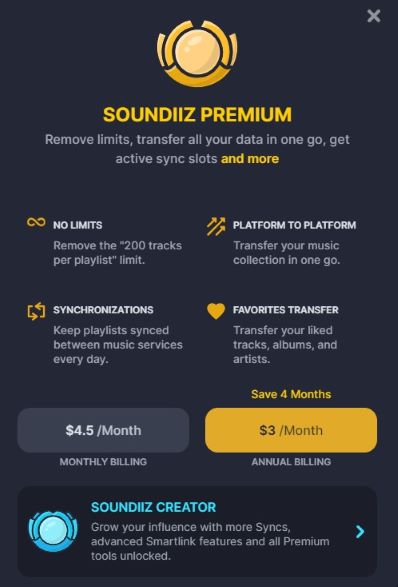
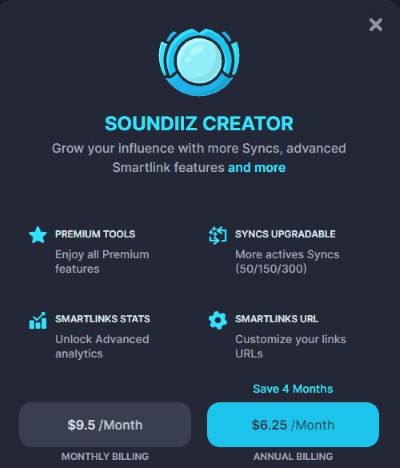
About Plans, Soundiiz offers a Premium Plan and a Creator Plan. Premium Plan costs $4.5/month, or you can save some money by billing it at $36/year. Creator Plan costs $9.5/month and you can save money by billing it at $75/year.
Soundiiz Premium Plan allows you to remove 200 tracks/per playlist, sync up to 29 playlists, transfer from platform to platform in one go, etc.
Soundiiz Creator Plan allows you to sync up to 50 playlists. Additionally, Soundiiz offers a smart link feature, which allows you to share your music collections in a single link. Creator Plan account can customize their smart links and enjoy an analytics feature to help them analyze their links’ traffic.
Soundiiz does come with some drawbacks and limitations, though. Compared to other Spotify to YouTube playlist converters like TuneMyMusic, Soundiiz’s interface can be somewhat busy and difficult to navigate. Free users can only transfer one playlist at a time, and each playlist can’t exceed 200 tracks. Additionally, Soundiiz’s transfer speed is a bit slower than the other converters mentioned in this article.
Now, let’s see how to transfer playlist from Spotify to YouTube Music with Soundiiz:
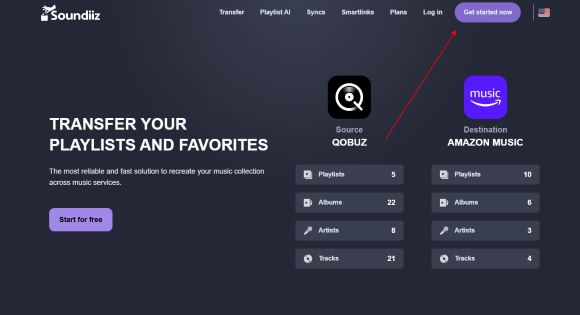
Step 1. First, go to soundiiz.com, click on the big purple “Get started now” and log in.
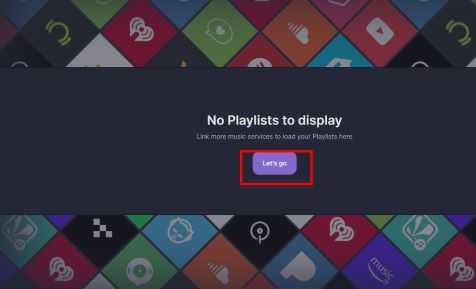
Step 2. Click on “Let’s go” in the center of the main window.
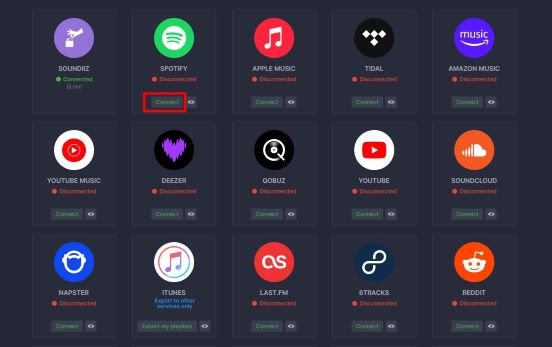
Step 3. Find Spotify and click “Connect”, then follow the instructions to log in to your Spotify account and grant Soundiiz the necessary permissions.
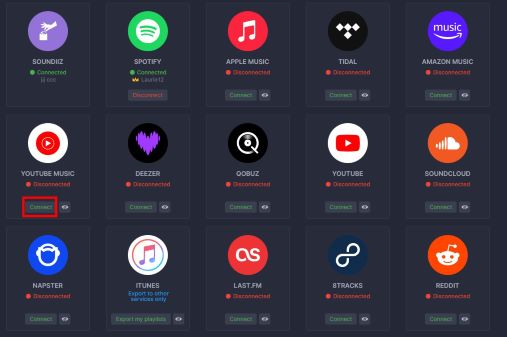
Step 4. We need to give Soundiiz the authentication of our YouTube Music account, too. To do this, find YouTube Music and hit “Connect”, then log in to your YouTube account.
Step 5. Then go back to the main window of Soundiiz, here you can view all your Spotify playlists and YouTube Music playlists.
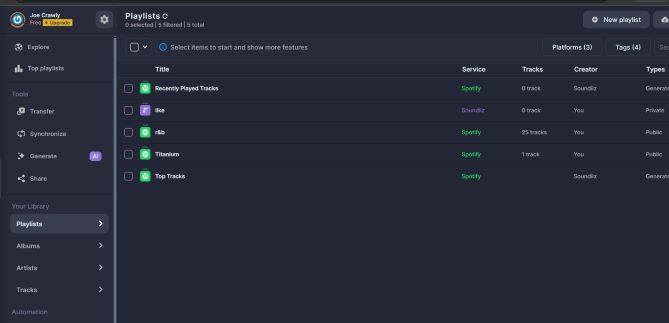
Step 7. To transfer your Spotify playlists to YouTube Music, if your account is a free one, select one of the Spotify playlists with green icon. Then hit “Transfer” from the tool bar on the top.
Note:
If you have a Premium account, you can select multiple playlists at the same time.
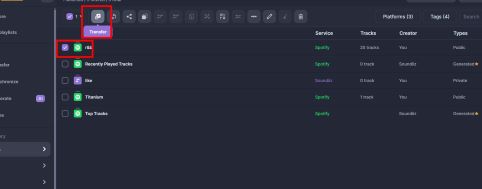
Step 8. Edit the information of your playlist, confirm your tracklist to transfer to YouTube Music in the playlist, and then select YouTube Music as your destination service to transfer Spotify playlist to.
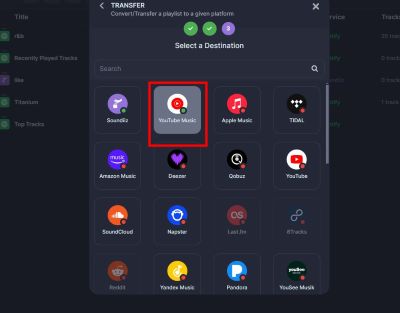
You may need to wait for a while for it to complete the whole process, and you should be able to find the transferred Spotify playlist in your YouTube Music account.
If some tracks are missing, it offers a feature to view them too, just hit on errors and the missing tracks would be listed.
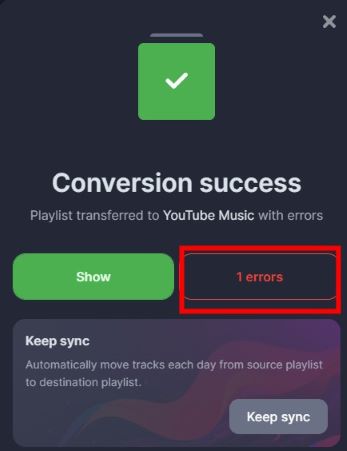
However, during my test, it seems like the service is not very stable, it fails to transfer a few times.
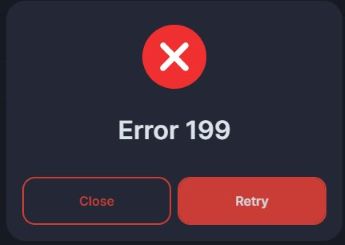
Who knows, maybe it’s a temporary issue, if you encounter the same problem, you can retry a few times or contact their customer service for help.
Pros and cons of transferring Spotify playlist to YouTube with Soundiiz
Pros
-
 Many additional features.
-
 Easy to access.
-
 Allow free users to sync one playlist.
-
 Support converting multiple playlists at the same time.
Cons
-
 Busy interface, a little hard to navigate.
-
 Slow transfer speed.
-
 Sometimes can be unstable
Part 3. How to Import Spotify Playlist to YouTube Music with FreeYourMusic
FreeYourMusic is also one of the most popular Spotify to YouTube Music playlist converters among the search results when you search “transferring Spotify playlist to YouTube Music” in the search engine. It is a application that needs to be downloaded to use, and it supports all the platforms, including Windows, Mac, Android, iOS and even Linux.
About its plan, guest users can transfer up to 100 tracks and 1 playlist for free, and after signing up with an email account and log in, they can transfer additional 200 tracks more.
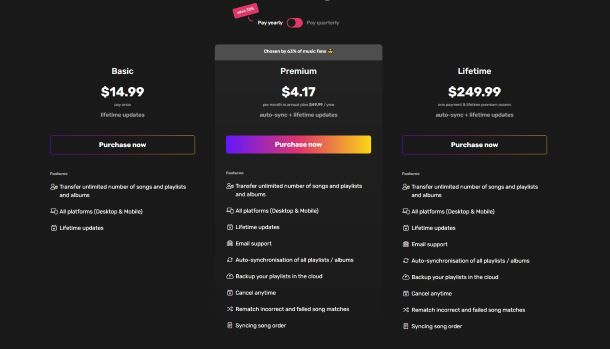
There are two types of paid plans available: the Basic Plan and the Premium Plan. You can check their prices from the picture above; the quarterly Premium plan costs $6.66.
The Basic Plan allows users to transfer unlimited tracks between different services. Premium users can enjoy additional features like auto-synchronization of playlists and backup of playlists in the cloud. Although I didn’t try the latter feature, I noticed that Soundiiz offers a "Soundiiz" playlist feature, which users can transfer playlists from their streaming services into.
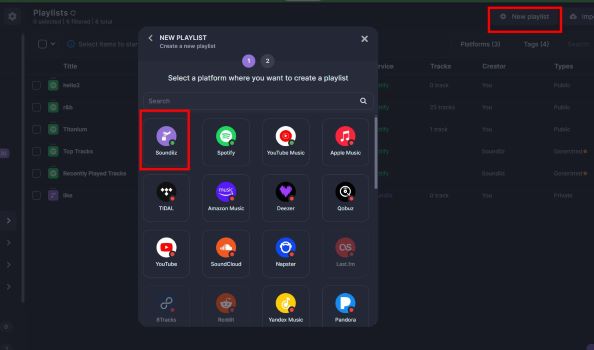
So that even if your streaming account is hacked or you forget your password, you can still log in Soundiiz to access your collected music of your streaming service account with these created “Soundiiz” playlists. I think the “Backup your playlists in the cloud” here serves the same function.
Ok, now let’s see the steps of importing Spotify playlists to YouTube Music.
Step 1. Go to freeyourmusic.com and download the version of FreeYourMusic that is compatible with your device.
Step 2. Follow the instructions to install it. Then launch it and in the “Transfer” window, select Spotify and log in your Spotify account to specify it as the streaming service from which you want to import playlists.
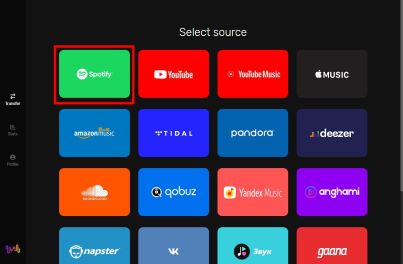
Step 3. Then the program would prompt you to select a destination service, select YouTube Music and log in.
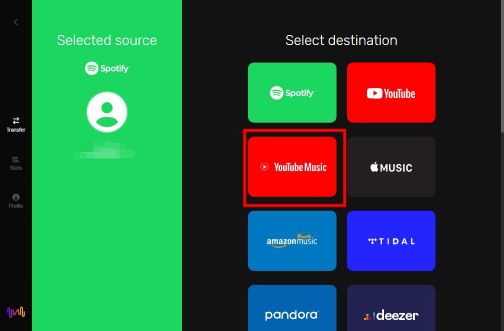
However, when I tried to log in my YouTube Music account, this warning about compatible issues with Chrome browser popped up,
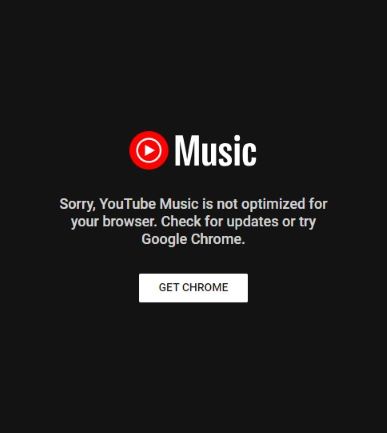
and I tried many times and a few methods, still can’t solve this problem. The weird thing is I can log in to other services normally, but not YouTube Music—ironically, just when I’m writing an article about it. Maybe the issue is on my end, if you don’t encounter this problem, you can proceed as planned. For now, I’ll use Tidal Music as a substitute to continue demonstrating the steps for transferring Spotify playlists.
Step 4. A window showing your Spotify playlists would show up. You can select the ones you want to transfer and hit “Begin Transfer”.
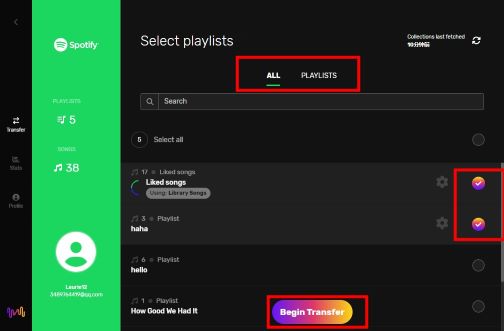
Note:
FreeYourMusic Premium account users would enjoy the features to sort their Spotify music collections as “Playlists”, “Album” and “Liked Songs” on the top to help them organize their music collections neatly. Free users can only access their music collections sorted by playlists.
Step 5. Transferring would begin after you hit the button, in my case, the speed is quite fast.
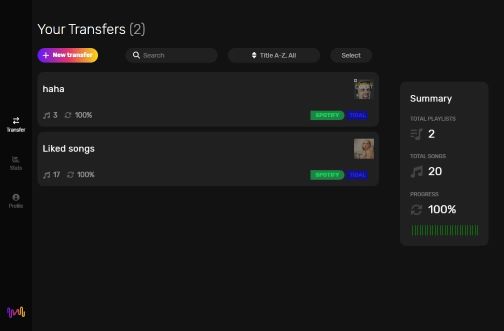
FreeYourMusic also offers a “Stats” feature like what N-gen Art does to help you analyze your listening habits on each streaming service. Go to “Stats” on the left sidebar of the main window.
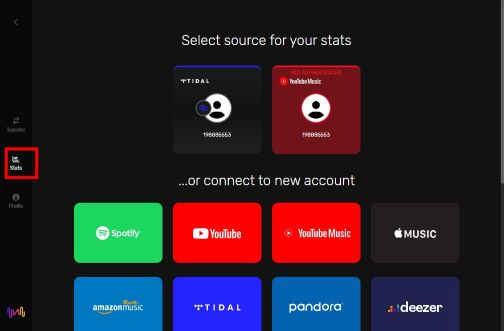
Follow the instructions to begin analyzing your streaming services’ playlists. After it’s done, click “open” to view the results.
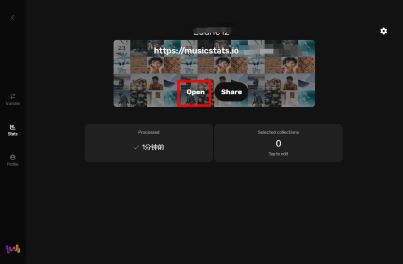
In the opened browser, you can view your top songs, top artists, and more across different time ranges. While this feature may not be as comprehensive as N-gen Art's, it's still a valuable addition for gaining insights into your listening habits.
Pros and cons of transferring Spotify playlist to YouTube Music with FreeYourMusic
Pros
-
 Fast transfer speed.
-
 Easy-to navigate-interface
-
 Support converting multiple playlists at the same time.
-
 Have a stats feature to help users analyze their listening hobbits.
Cons
-
 Maximum number of songs to convert for a free user is relatively low.
-
 Need to install an app to use.
-
 Basic Plan is relatively expensive.
Part 4. How to Transfer Playlist from Spotify to YouTube with Open Script
Maybe you don’t want to pay to import your Spotify playlist to YouTube, then this open script is a good choice, though it might seem a bit daunting if you are not that much a tech person. No worries! The steps involved are super easy. Here, I will list every step to transfer your Spotify playlists to YouTube Music on Windows using the open script. Just follow along, and you’ll be able to do it!
Step 1. First, the script uses python as its language, so you need to go to official website of python to download it (If you are using Linux, you may already have python installed and can skip this step). Hit the big yellow download button in the center to download it.

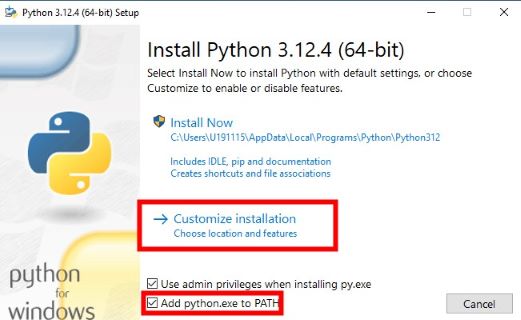
Step 2. Remember to check “Add python.exe to PATH” so that we could use it in terminal. And it’s recommended to customize a drive other than the C drive to install python. After specifying install location, you can simply hit “Next” all the way to complete the installation.
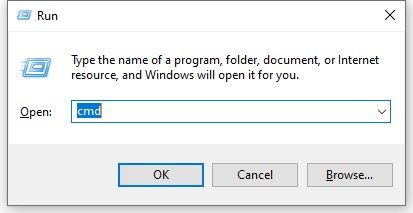
Step 3. Press “Win” + “R” on the keyboard, on the window popped up on the bottom left, type “cmd” and press enter to open a cmd window.
Step 4. In the opened cmd window, execute the command below to install of GitHub repo.
pip install spotify2ytmusic
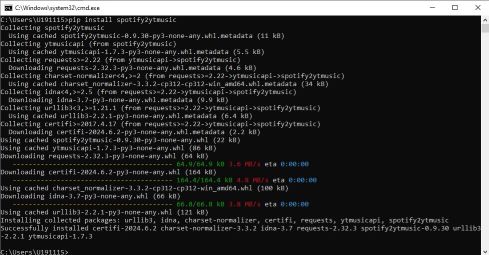
Step 5. Next, execute the following command and you can now access the program! See? It’s super simple, just two lines of command and it’s done.
s2yt_gui
In the main window of the program, first hit “Login” to log in to your YouTube Music account. Then a new cmd window and browser window would pop up, prompting you to log in to your YouTube Music account.
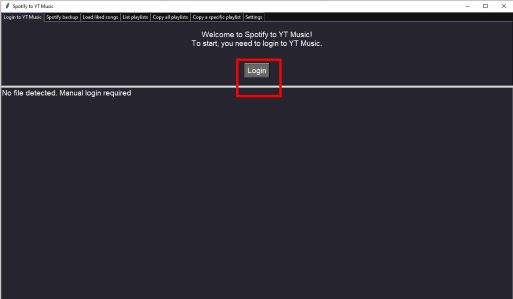
After you have finish filling your log in information in the browser window, go back to the new cmd window and press “Enter” key to finish login.
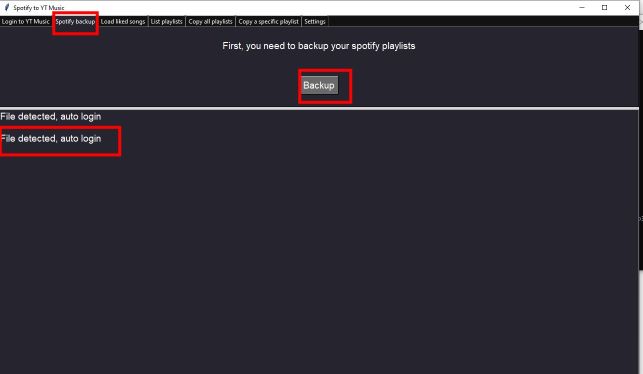
Step 6. Then you will see a “File detected” prompt in the main window of the program. Next you need to backup your Spotify account before converting Spotify playlists to YouTube Music. In the “Spotify backup” tab, hit “Backup” in the center and follow the instructions to log in your Spotify account.
Step 7. Now let’s begin to actually transfer Spotify playlists to YouTube Music with this open source script. In the “Load liked song” tab, Hit “Load” to transfer liked songs of your Spotify to YouTube Music, Then the program would go through your liked songs on Spotify, and like them one by one on YouTube Music.
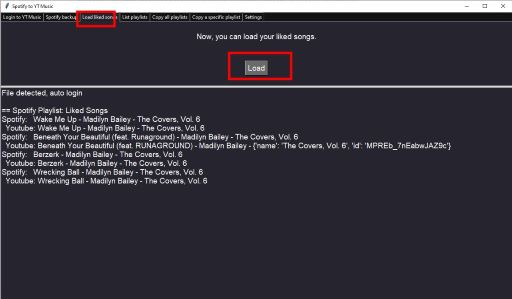
This is one of the few converters that can transfer liked songs from Spotify to YouTube Music. Many people’s curated songs are often found in their "Liked Songs" since it's very convenient to add favorite tracks there while listening. If most of your curated Spotify songs are in "Liked Songs," this script is an excellent tool to help you transfer them to YouTube Music.
Other than transferring liked songs on Spotify to YouTube Music, it can also copy all your Spotify playlists to YouTube Music in one go. Under the “List playlists” tab, click “List” to list all your Spotify and YouTube Music playlists, note that the first column is their playlist id, it is useful when converting specific Spotify playlist to YouTube Music.
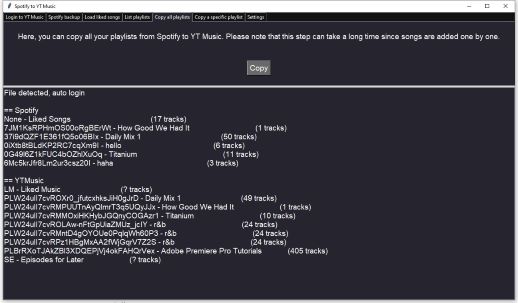
Then the program would automatically go to “Copy all playlists” tab, here, you can click “Copy” to transfer all your Spotify playlists to YouTube playlists.
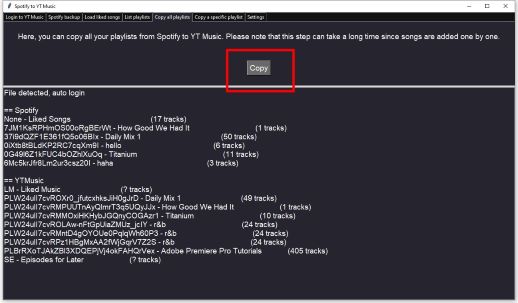
The process would be relatively slow because the program transfer songs in your Spotify playlists to YouTube Music one by one.
Additionally, you can also choose to transfer specific playlists instead of transfer them all in one go. To do this, go to “List playlists” tab and find and copy the playlist id of playlists you want to transfer from Spotify to YouTube Music.
Then go to “Copy a specific playlist” tab, paste them in the input bar respectively.
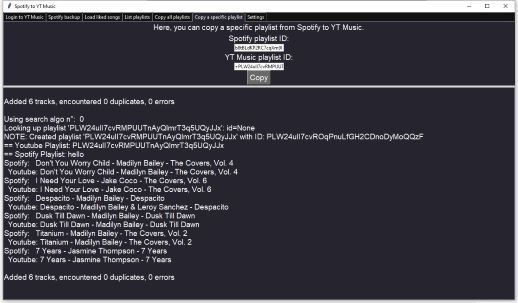
If you want to transfer a Spotify playlist to directly to YouTube Music, simply add a “+” before your YouTube Music playlist id and the program would automatically create a new playlist containing the transferred songs in YouTube Music for you. And If the transfer process accidentally closed, rerunning “Copy all playlists” or “Copy specific playlist” is safe, it won’t copy duplicated playlists.
Although use this open script to copy your Spotify playlist to YouTube Music is free, it’s relatively slow since it copies one song at a time, and compared to other converters, this one can only convert Spotify playlists to YouTube Music, other converters can transfer playlists to and from many streaming services.
Pros and cons of converting Spotify playlist to YouTube with open script
Pros
-
 Completely free.
-
 Support transferring liked songs.
Cons
-
 Need to use command line.
-
 Can only transfer playlists from Spotify to YouTube Music.
How to Transfer Spotify Playlist to YouTube Music with Open Script
Part 5. How to Fix Missing Tracks During Transferring Playlists via DRmare Spotify Music Converter
Although the playlist converters mentioned above can transfer Spotify playlists to YouTube Music, they can't help if some tracks on Spotify are unavailable on YouTube Music. Fortunately, YouTube Music’s awesome “Upload Music” feature, which allows users to upload their local audio files directly. This means you can download the missing tracks from Spotify first and then upload them to YouTube Music to complete your playlist. However, Spotify music is downloaded in the OGG Vorbis format, and this content becomes inaccessible when your Spotify Premium subscription expires.
If you don’t want to pay for Spotify’s monthly fees, don’t worry. DRmare Spotify Music Converter can help you out. This powerful tool can download and convert Spotify music into MP3, FLAC, WAV, AAC, and other common formats. It also allows batch downloading at 5x faster speeds. Additionally, it can automatically create folders to help you organize your music efficiently.

- Download and convert Spotify music in batch at 5x faster.
- Sort your downloaded Spotify music in organized folders for you.
- Download Spotify music with lossless quality and preserve all ID3 tags.
- Come with intuitive and easy-to-navigate interface
Ok, let’s see the specific steps to fix Missing Spotify tracks on YouTube Music via DRmare Spotify Music Converter.
Step 1. Download and install DRmare Spotify Music Converter on your computer.
Step 2. Launch DRmare Spotify Music Converter and Spotify app on your computer would launch automatically.
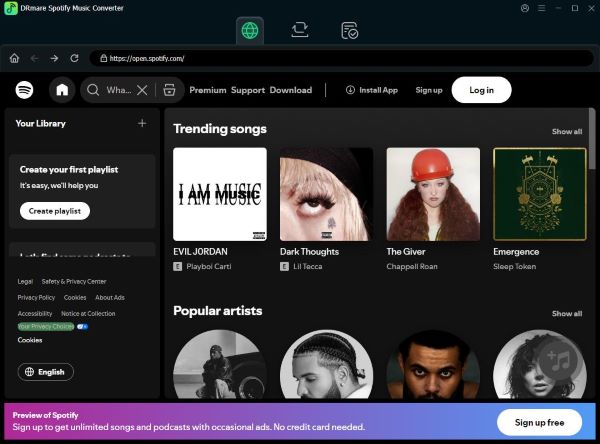
Step 3. Find the missing tracks during the process of transferring Spotify playlists to YouTube Music. Then drag them into the main window of DRmare Spotify Music Converter one by one to select them.
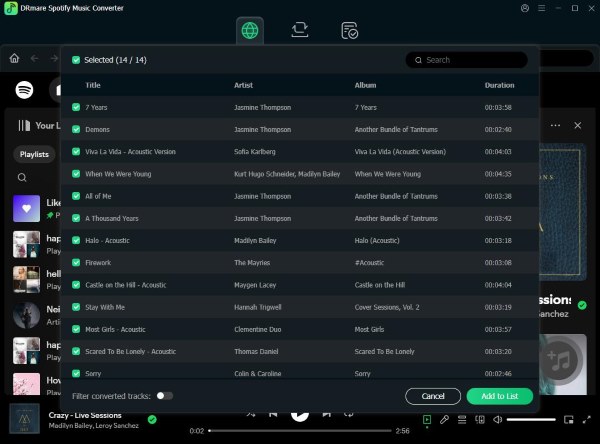
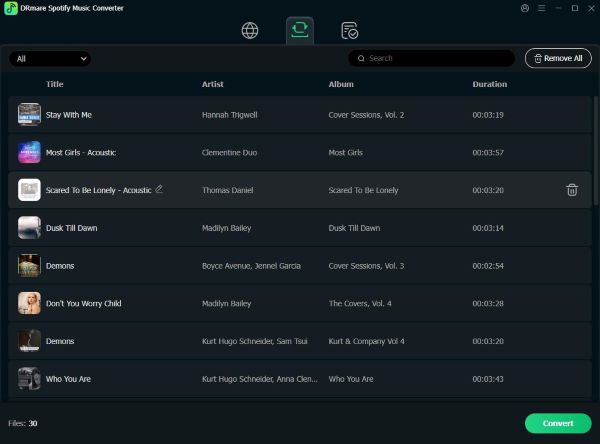
Step 4. Next, click on the “Convert” button at the bottom right of the window to begin conversion.
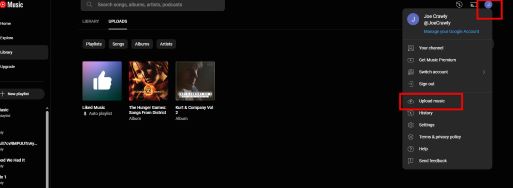
Step 5. After conversion, you can find them in the specified folder. Then, open YouTube Music app or go to YouTube Music web player. Hit the profile icon, followed by “Upload Music”.
Step 6. Select the tracks in the playlists you just downloaded and start uploading. After uploading, you can find them through “Library” → ”Uploads” → “Songs”.
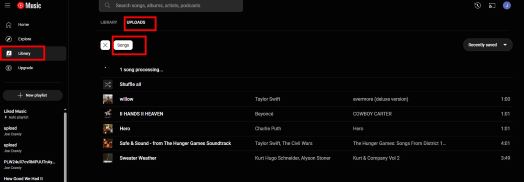
Finally, you can select the songs and add them to the original playlists where they were missing.
Part 6. Conclusion
In conclusion, for free users, TuneMyMusic and FreeYourMusic have the fastest transfer speed, but they have relatively high limitation for the number of the tracks a free user can transfer, only hundreds of songs in total. Soundiiz have many additional features, but it can be unstable sometimes. Using the open script to transfer Spotify playlists to YouTube Music is completely free, and it can transfer liked songs in Spotify to YouTube Music. However, it needs to use command line, though the whole process is very simple.
For paid users, if you prefer faster transfer speed, I recommend TuneMyMusic and FreeYourMusic, and if you value additional features, Soundiiz might be the suitable choice for you
Personally, I recommend transferring Spotify playlists to YouTube Music with the open script most. At last, if you encounter missing tracks during the transfer process, you can use DRmare Spotify Music Converter to download them locally and upload them to YouTube Music to fill the gaps.


User Comments
Leave a Comment