Many users find the Spotify client to be less than perfect, with too many ads and a busy layout. Fortunately, as one of the world's largest streaming services, Spotify has inspired many developers to create programs that enhance its client out of a labor of love.
SpotX GitHub, or SpotX Spotify is one of these remarkable tools to make Spotify better. It is a perfect Spotify Client tweak that can block banners, audio and video ads in Spotify Client. Additionally, it allows you to do some customizations to your Spotify client to make it better suit your preferences.
Note:
SpotX is currently only available on Windows 7, Windows 8, Windows 10, and Windows 11.
Although we need some codes to install and set up SpotX GitHub, but don't worry, it's super easy! Just follow this guide, and with a little bit of copy-pasting, you'll be good to go!
Part 1. What is SpotX GitHub?
Maybe you already have some concepts about SpotX GitHub in you mind, but please allow me to explain what SpotX GitHub is in detail to help you get a better understanding of it and use it more smoothly later.
Here's a relatively detailed introduction from SpotX official about what it can do:
1. Blocks All Ads: SpotX blocks all banner, video, and audio ads in the Spotify client. No more annoying interruptions while you enjoy your favorite tunes.
2. Unlocks Skip Function: You can skip any track, even if you're not a premium user. This feature gives you more control over your listening experience.
3. Hides Unwanted Content: Optionally hide podcasts, episodes, and audiobooks from the homepage, creating a cleaner and more personalized interface.
4. Prevents Automatic Updates: Optionally block Spotify's automatic updates, giving you control over when and if you update the app.
5. Clears Audio Cache Automatically: Optionally clear your audio cache automatically, helping save space and keeping the app running smoothly.
6. Activates Experimental Features: Gain access to more experimental features that aren't yet available to regular users, allowing you to try out new functionalities.
7. Disables Sentry: Prevent Sentry from sending console logs, errors, and warnings to Spotify developers, enhancing your privacy.
8. Disables Logging: Stop various elements from logging your user interactions, further protecting your privacy and improving performance.
9. Removes RTL Rules: Remove all right-to-left CSS rules to simplify the CSS files, which can help with performance and customization.
10. Minifies Code: Minify the code to improve performance and reduce the overall size of the SpotX package.
After I've tested it, I found SpotX Spotify includes some of its own tweaks to break the limitations set on Spotify Free users.
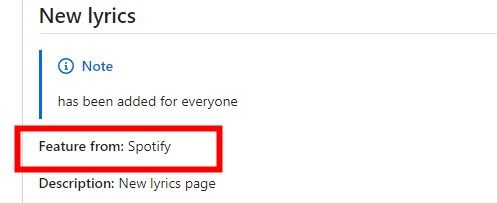
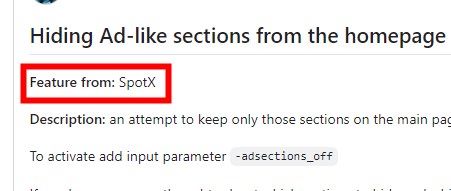
In addition, it contains many Spotify features that have been deleted in the new version of the app. If users find they prefer these older features, SpotX Spotify provides options for users to turn on them easily. You can follow the guide in part 2.3 to do it.
Tips:
You can find all features provided by SpotX here: https://github.com/SpotX-Official/SpotX/discussions/50
Altogether, the main function of SpotX is to block the ads on Spotify, including banners, audio and video ads, even the only ads in podcast for Spotify Premium users.


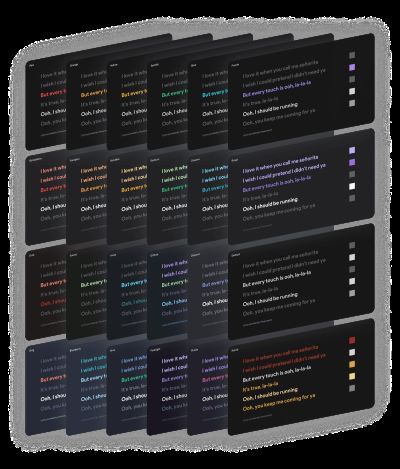
Personally, I fancy the new themes of lyrics feature comes from SpotX, it makes lyrics on Spotify more interesting.
Tips:
You can find all supported lyrics themes here: https://github.com/SpotX-Official/SpotX/discussions/50#discussioncomment-4096066
There are many other interesting features on SpotX, you can go to their official list of experimental features mentioned above to check which feature fits your taste and set them up for your Spotify with following guide.
Part 2. How to Download, Install and Set Up SpotX GitHub
There are two ways to install SpotX, one is through bat script, and the other is to use command line. Both of the two methods are straightforward.
First, go to the official page of SpotX and scroll down to "Fast Install/Update" section, there lists four ways to install SpotX.
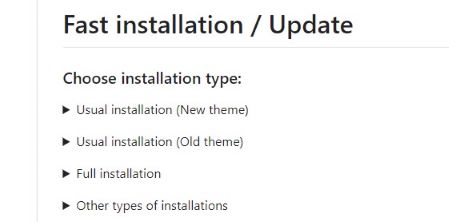
Here we will demonstrate with "Full installation" option, and if you prefer other installation methods, the process is essentially the same, you can follow the pattern to install SpotX Spotify with your preferred installation options.
Note:
Make sure your Spotify isn't installed from Microsoft Store, if it is, you may need to uninstall and reinstall it from Spotify directly.
How to Install SpotX GitHUb through Bat Script
Step 1. Navigate to "Fast Install/Update" section on the official GitHub page.
Step 2. Click on the triangle icon on the left side of "Full installation" to expand detailed information.
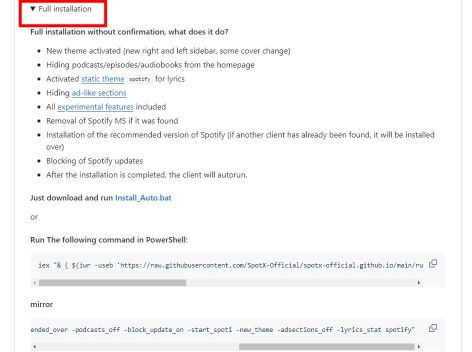
Step 3. Click on highlighted "Install_Auto.bat" to install the bat script.

Step 4. After the installation is done, double click on the downloaded script, and it will execute automatically, allow any permissions if asked.
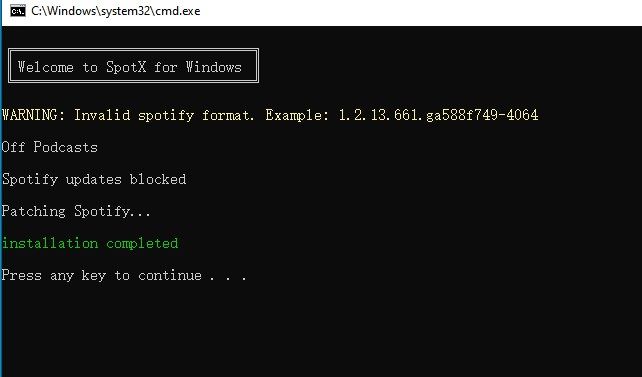
And it's done! Super easy, isn't it?
How to Install SpotX GitHUb through Command Line
Step 1. Go back to the detailed information view under “Full installation” option.
Step 2. Locate the two powershell command lines below, you can choose either of them to install SpotX, they serve the same function. But during my test, the first one is invalid now, only the second one works, you can click on the copy button on the right of the second powershell command line to copy it.
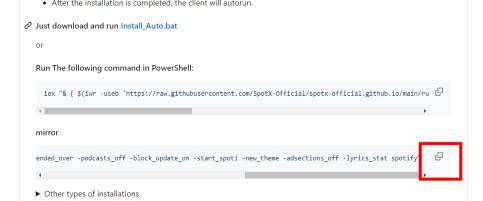
Step 3. Next, in the search bar of task bar on your windows, type "powershell", then click on the first result to open powershell window.
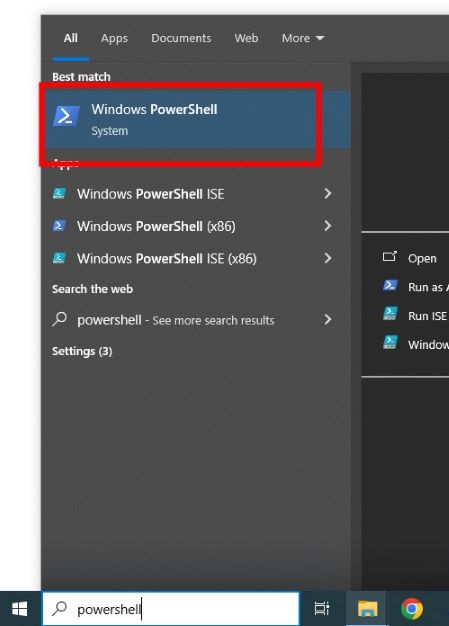
Step 4. Finally, in the opened powershell window, paste the powershell command you just copied and hit Enter key on your keyboard to execute it. After it finishes, you can see a "installation completed" prompt in the end.

Now, after installation, your Spotify will fire up automatically, and you will find all those annoying ads are gone!
How to Use SpotX Spotify for Personalization
SpotX allows users to do some customizations via parameters added in the powershell command line. The parameters are composed of a "-" and commands after it, For example, the parameter used to block ads on Spotify home page is "-adsections_off".
Let's take a look at this official command line to better understand how it works:
iex "& { $(iwr -useb "https://spotx-official.github.io/run.ps1") } -m -confirm_uninstall_ms_spoti -confirm_spoti_recomended_over -podcasts_off -block_update_on -start_spoti -new_theme -adsections_off -lyrics_stat spotify"
You don't need to pay attention to the daunting initial part of the command line, just focus on the latter part, let me explain each parameter's function for you:
1. confirm_uninstall_ms_spoti : Automatically uninstall Spotify MS if detected
2. confirm_spoti_recomended_over : Automatically install the recommended version if an outdated or unsupported Spotify version is found
3. podcasts_off : Remove podcasts from the homepage
4. block_update_on : Block automatic Spotify updates
5. start_spoti : Automatically launch Spotify after installation
6. new_theme : Activate a new theme (new right and left sidebar, some cover changes)
7. adsections_off : Hide ad-like sections from the homepage
8. lyrics_stat : Enable static themes for lyrics, e.g., activate the blueberry theme with _lyrics_stat_blueberry
You can simply add or delete parameters like these ones in the command line and execute it to turn on the corresponding features you want in your Spotify client.
Tips:
You can check the full supported parameters here: https://github.com/SpotX-Official/SpotX/discussions/60
Customize SpotX Spotify Installation through Bat Script
If you prefer installing SpotX with bat script, you can follow steps below to customize certain features during SpotX installation:
Step 1. Right click on the downloaded bat script and select “Edit”
Step 2. In the opened notepad, add or delete targeted parameters in the highlighted part in this picture.

Step 3. Then save and close the notepad program.
Step 4. Double click on the bat script to execute it.
Step 5. After it finishes, you should find desired feature applied.
Customize SpotX Spotify Installation through Command Line
Step 1. Add or delete the targeted parameter in your command line to install SpotX.
Step 2. Open powershell and hit Enter key to execute it.
Step 3. After installation, the desired feature should be applied in your Spotify Client.
Part 3. FAQs about SpotX GitHub for Spotify
Why does "-devtool" parameter doesn't work?
You need to specify the Spotify version in the parameter used to install Spotify SpotX as mentioned above. For example: "-version 1.2.13.661.ga588f749-4064", you can check the Spotify version information from its official page.
How to uninstall SpotX?
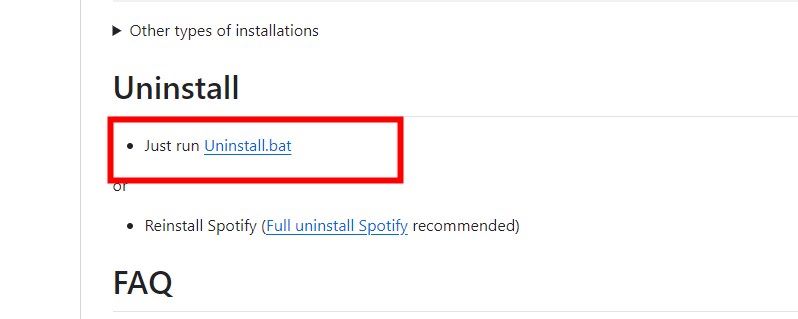
Click on the uninstall bat script provided on SpotX GitHub official page to download it, then double click on it to execute.
How to block the ads in podcast with SpotX GitHub if I am a Spotify Premium user?
You can add the parameter "-premium" in the command line used to download Spotify SpotX as mentioned above and execute it, then the ads won't appear while you are listening to podcast with you Spotify Premium account.
Part 4. Best SpotX Alternative - DRmare Spotify Music Converter
SpotX Spotify is an amazing tool to block ads on Spotify and ensure us a smooth listening experience on Spotify. However, free users is still limited to the audio quality of up to 160 kbps. Don't worry, here is a perfect alternative, namely DRmare Spotify Music Converter!
It allows you to download and convert Spotify music into common audio formats with original quality without Spotify Premium, up to320 kbps, which is the highest quality supported by Spotify. After conversion, you can upload them on your Spotify, and listen to them with Spotify still. This way, you can not just enjoy ads-free listening experience, but also high-quality playback even after your Spotify Premium expires or you don't have one at all.

- Enjoy lossless music other than ads-free listening experience
- Listen anywhere, anytime with converted Spotify Music
- Convert Spotify Music in batch at 5x faster speed
- Intuitive and friend interface
Next, let's see how to download and convert Spotify music into common formats like MP3, FLAC, WAV, etc., with original quality.
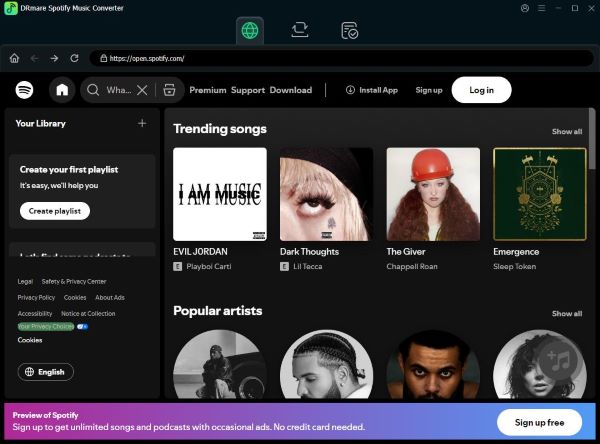
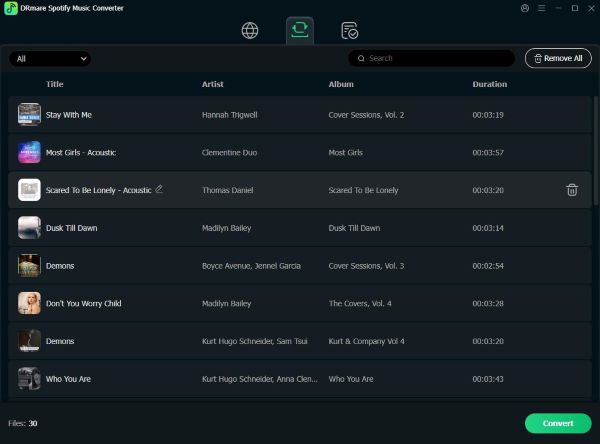
Step 1. First, download and install DRmare Spotify Music Converter and launch it. Browse your Spotify library and click the "Add" > "Add to List" button to load favorite songs.
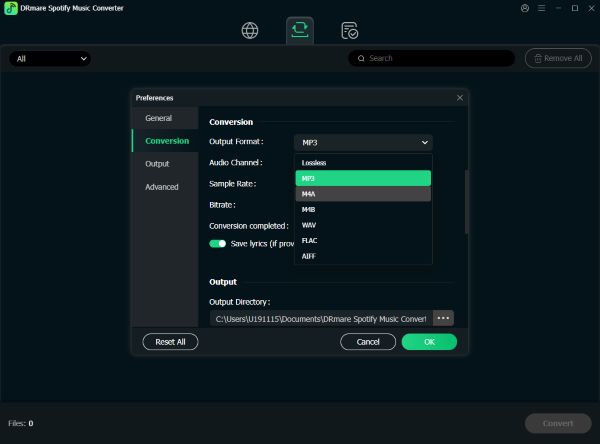
Step 2. Hit on the menu icon on the top right corner, then select "Preference" and navigate to "Conversion" tab, You can specify the desired output formats and sample rate, bit rate. If you want music with original quality, just select 320 kbps for bit rate and 48khz for sample rate. Remember to save your changes and close the window.
Step 3. Finally, click on the "Convert" button on bottom right to start convert procession. After conversion, you can find the converted songs in the specified folder. Then turn on "Show local files" feature in your Spotify setting and enjoy both ads-free listening and high quality music!
Part 5. In Conclusion
If you're tired of ads and a cluttered interface on Spotify, SpotX GitHub is a great fix. It blocks all ads, unlocks skips, hides unwanted content, and adds customization options, all with a simple installation process. For even more control and higher audio quality, DRmare Spotify Music Converter lets you download and convert songs at up to 320 kbps without needing Premium. Whether you tweak Spotify with SpotX or go ad-free and high-quality with DRmare, your ideal Spotify experience is just a few steps away.


User Comments
Leave a Comment