Shotcut is a very easy and impressive open source video editor. But if you don't have any video editing experience before, you may still feel it difficult to edit movies with Shotcut due to the reason that the related tutorials are lacking online. What's more, iTunes movies are protected with the FairPlay copyright protection, making it is even harder for beginners.
Have you ever thought of editing iTunes videos with Shotcut to create wonderful movie? If so, you have definitely come to the right place. This post will presents you with tutorials about removing DRM from iTunes M4V and editing M4V on Shotcut.

Part 1. Main Features of Shotcut
As a free video editing software, Shotcut has surprisingly powerful features of which most only exist on prosumer level editing suite. By clicking on the menus or buttons listed on the main screen of Shotcut, you will see numerous views and UI elements. Following is a list of the top features.
1. Supports many audio and video formats and codecs like FFmpeg as well as photos and image sequences.
2. Create, edit, play, load, encode, save and stream MLT XML projects with Auto-save feature.
3. Audio, video and screen capture, batch creates and combines resources easily into one project.
4. Supports a lot of video filters such as the Alpha Channel, Blur, Chroma Key, Color Grading, Diffusion, Crop, Invert Colors, Glow, Mirror, Key Spill, Old Film and so on.
5. Supports multiple audio filters like Bass & Treble, Balance, Band Pass, Copy Channel, Compressor, Gain, High Pass, Delay, Low Pass, Pan, Reverb, Swap Channels.
6. Append, insert, overwrite, lift and delete editing on the timeline.
7. Built-in the transitions fade in and fade out, cross-fade, video wipe for audios and videos.
8. Export video to HEVC, M4V, MOV, MP4, MPEG, OGG, OGV, RM, MXF, MD5, PSP and much more.
Part 2. Solution to Make iTunes Movies Editable on Shotcut
iTunes movies are not expected to be edited with the DRM protection. On one hand, this is for protecting the benefits of the producers, publishers and resellers. On the other hand, this also affects the legal use of the paid users.
So is there a better to solve this problem? Of course, though under Digital Millennium Copyright Act, users are not allowed for removing DRM for business use, it is 100% legal to do that for personal use. In this case, you can get an DRM converting software to help you remove DRM from iTunes movies before importing them to Shotcut video editor.
DRmare M4V Converter is specially designed for such a scenario to encode iTunes DRM movies to unrestricted videos.
Differs from other tools which combines other unrelated features, DRmare M4V Converter for Mac has a cleanest and sleekest screen. Besides, the UI interface are customizable, users can simply change the display language on the settings window. The biggest advantage that really impress me is the 20X faster converting speed and lossless quality. Few software in the market has such robust features.

- Easy, intuitive, user-friendly screen with customizable language options
- Convert iTunes movies quickly without any delay or quality lose
- Keep original subtitles, audio tracks, closed caption, AD and so on
- Global 24/7 technical support, answer any questions in a timely manner
Part 3. Steps to Remove DRM from iTunes M4V Movies
To edit your iTunes movies in Shotcut video editor, the first thing you need to do is to disable the DRM protection. The trial version has functionally the same features like the paid version. Now let's work together to find out how it performs.
- Step 1Drag to import iTunes M4V videos
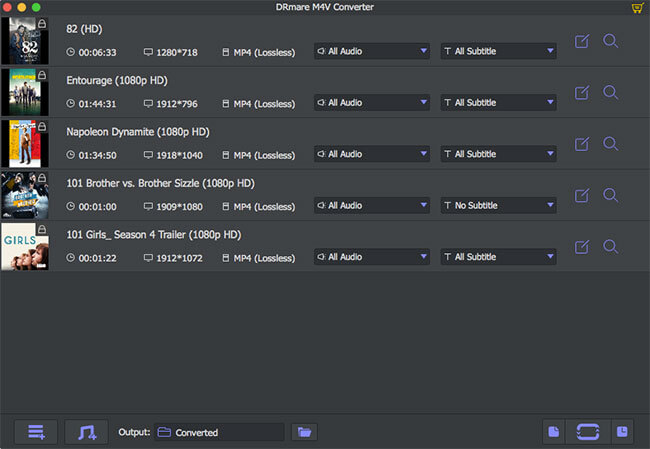
- After installing and launching DRmare M4V Converter, you will see the main screen of DRmare M4V Converter for Mac. Just drag & drop the M4V videos to the DRmare main screen. You can import multiple videos.
- Step 2Change the output video format for Shotcut
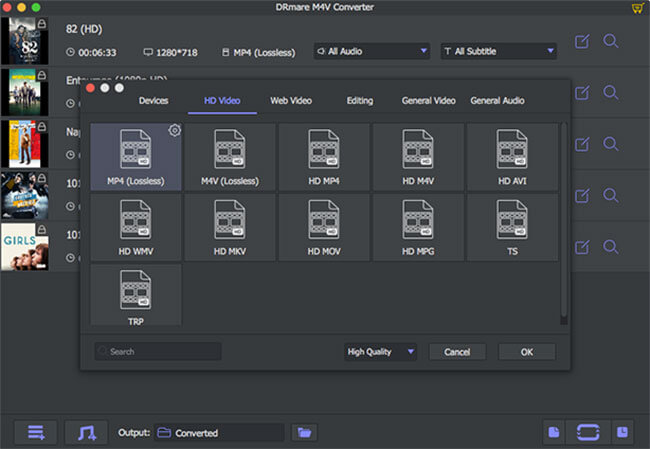
- This is an optional step because all the output formats should be supported by Shotcut. You may keep all the default settings. But if you are an advanced user who has specific requirements about the output videos, you can also set the parameters such as bit rate, frame rate, codec as well as select the subtitle, audio track etc.
- Step 3Export your iTunes movies
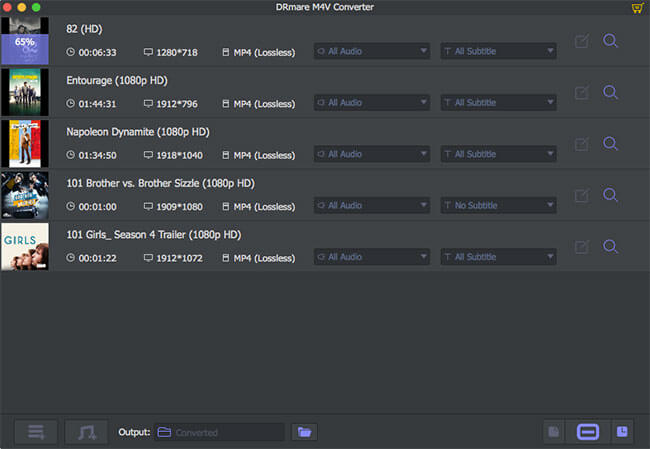
- Finally you can select the output folder and click the 'Convert' button from the bottom right to start converting. A status bar will show you the converting progress of your videos on the main screen. Sometimes other software progresses on your computer may affect the software from running smoothly, so please don't do other things during the converting.
Part 4. Beginner's Guide on Shotcut
Now let me show you how to use Shotcut to edit your converted iTunes movies to create a new movie. Shotcut offers a very easy-to-understand workflow for editing.
After removing DRM, there is not obstacle preventing you from importing the videos purchased from iTunes store. You can just follow the screen wizard to do anything as you want. If you do anything wrongly by accident, you can also click 'Undo', 'Redo' button or use click 'History' to go back to the previous status you want. In general, you can follow the 4 steps:
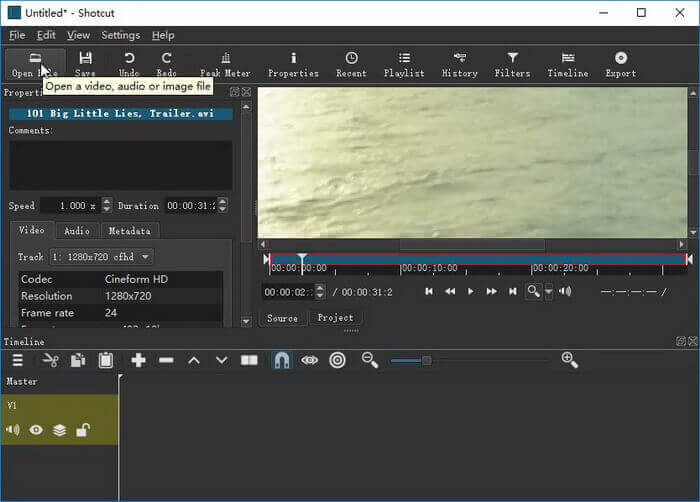
1. Import videos to Shotcut. Just click 'Open File' menu, it will offer you the option to select a media file from your computer hard disk.
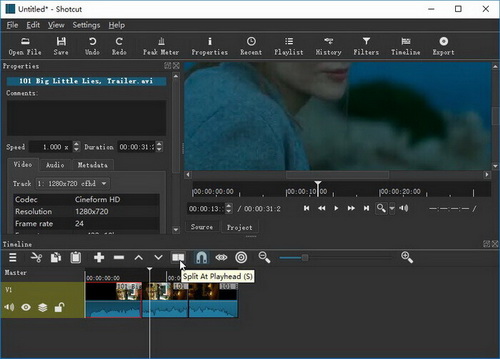
2. Do some basic editing. You can drag the movies to the timeline and then you can do the basic editing such as trimming, splitting, copying to rearrange and edit the videos.
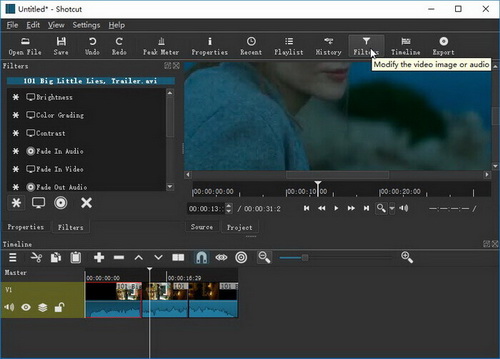
3. Apply filters. This is the best features of Shotcut which are usually found on prosumer level editing tools, please open the filter panel, then click '+' icon to add the filters you want and customize the parameters.
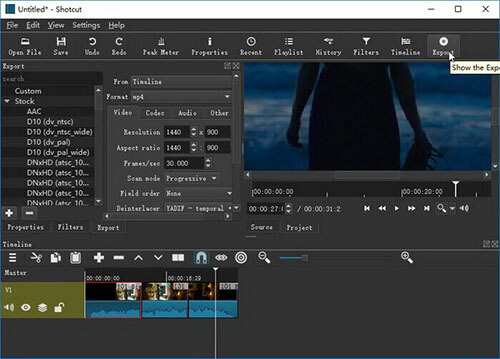
4. Export video from shotcut. The last step is click 'Export' to save the videos to your local hard disk for watching. Also, you can upload your created masterpiece online from your computer after exporting.


User Comments
Leave a Comment