Adobe Premiere Pro, a successor of Adobe Premiere, is a time-line based film editing tool tailored for professionals while its sibling Adobe Premiere Elements is targeted at consumer market for novice editors and consumers.
It is extremely powerful with a lot of more advanced editing features and advantages compared to Adobe Premiere Elements, like multiple camera editing, color correction tools, various sequences support, high bit-depth rendering, etc. By using it, you can edit and rearrange your raw footage to create new remarkable masterpiece to share to your friends and family members. Except for your own home videos, you can also edit other sources of videos to integrate them to your movies to make them even better.
Here I'm talking about movies you purchased or rented from iTunes Store. As you may find it's hard to edit iTunes movies with Adobe Premiere Pro, in this article, I will show you the tools and easy steps you'll need to edit iTunes M4V videos in Adobe Premiere Pro in just few minutes.
Part 1. Tools You'll Need to Edit iTunes M4V Movies in Adobe Premiere Pro
Video editing is a complicated job. To begin with, you need to have a Windows 7 or Mac 10.8 Computer with Dual-Core 2.0GHZ processor and 4G memory or above. A mobile phone or tablet simply won't work since they are not powerful enough. Second, you need to have the Adobe Premiere Pro on your computer. The trial version is valid for 30 days for free. If it is over 30 days, you have to buy a subscription license for the Adobe Premiere Pro. Finally, you need an iTunes DRM removal software too.
You may think it is as easy as editing other common video formats you shoot in Adobe Premiere Pro, but it is not the case for iTunes M4V videos which are FairPlay DRM protected. By default, the DRM protection limits the iTunes videos from playing and editing in other devices or software except Apple's. Don't worry. You can simply install DRmare iTunes to Adobe Premiere Pro Converter which is the most advanced DRM removal tool for iTunes movies and TV shows. With this smart app, you can easily eliminate DRM protection and import the iTunes movies to Adobe Premiere Pro for editing.

- Supports to add iTunes 1080p/720p HD movie rentals and purchases
- Convert iTunes DRM M4V videos to Adobe Premiere Pro supported MP4, MOV, AVI, etc
- Keep original quality, including AC3 5.1, closed caption, AD, subtitles, etc
- Runs at a 30X super faster speed without the need of transcoding iTunes videos
Part 2. Step by Step Instruction to Remove DRM from iTunes M4V Movies
After downloading and installing DRmare iTunes to Adobe Converter to your computer, you can simply follow the tutorial here and begin to remove DRM from the iTunes M4V videos in 3 basic steps:
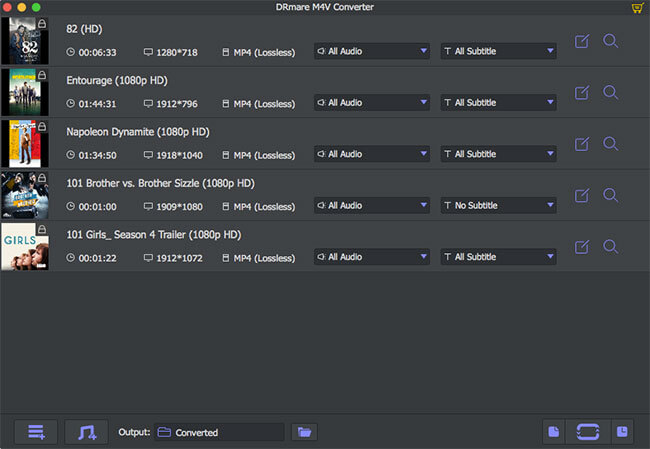
- Step 1Add iTunes M4V movies, episodes

- Please make sure you have downloaded the iTunes purchases and rentals completely to your computer first, then you can drag the iTunes M4V video files from iTunes library to the software main screen. Else they may not be imported. Another way is to click the '+' icon from the bottom left to open a pop up window, you will see the movies or TV shows which are on the iTunes and you can select the ones you want by clicking the check boxes in front of the videos.
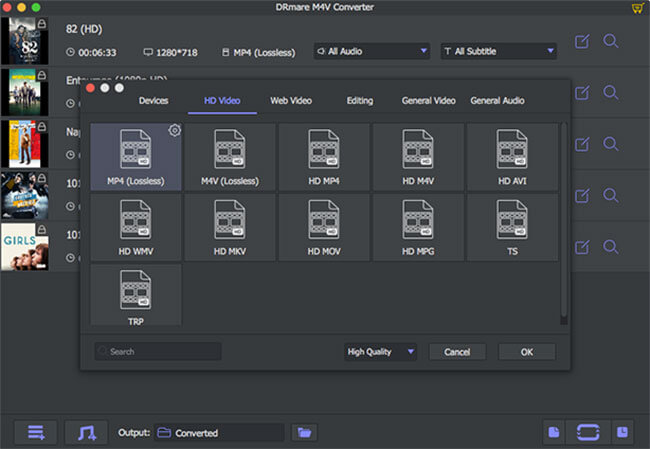
- Step 2Select output format for Adobe Premiere Pro

- Adobe Premiere Pro is a professional level video editing tool, it supports almost all the movie formats, so usually you can just need to keep default format MP4 to convert directly. In this way, the converting speed is the fastest and the quality will be 100% the same. If you have some specific requirements for your output video, you can click the small gear icon in front of the format icon to customize the bit rate, frame rate and you can also customize the subtitle and audio track.
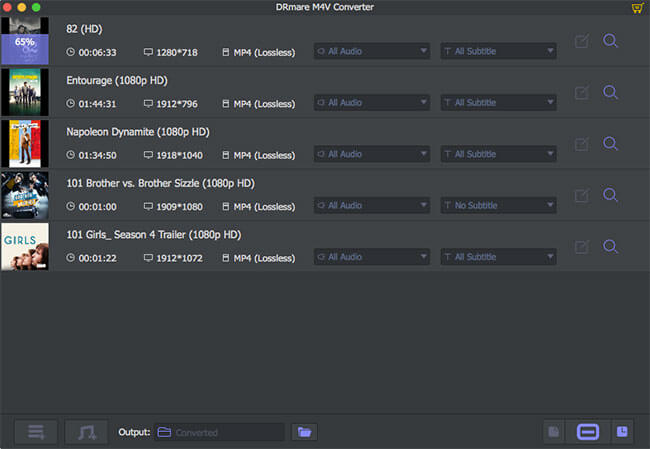
- Step 3Remove DRM from iTunes M4V

- When you finish the settings, you can click the 'Convert' button, iTunes will start to play the videos in background and DRmare M4V Converter will remove DRM and convert your iTunes M4V videos quickly. Please wait a few minutes until it is done completely.
Part 3. How to Import iTunes Videos to Adobe Premiere Pro
Now you can edit the DRM-free MP4 videos like other common movies or footage shoot by yourself with Adobe. You can import them to the Premiere Pro in two ways. If you are the first time to use Adobe Premiere Pro, please read on.
1. Import iTunes videos by the top menu. You can launch Adobe Premiere Pro to create a project first and then select 'File' > 'Import', then you will see a pop up window, you can locate your MP4 files and click 'Open' to add them to the library.
2. Import iTunes videos by the media browser. After opening your project, it will show you a media browser with a list of your hard drives and devices on the bottom left. Please simply open the hard drive or devices to find the files you want to import and drag them to the project library.
Adobe Premiere Pro is so powerful and it may require a relatively long time to master it well. If you are a new user, we'd suggest you to find more tutorial online to use it.
Part 4. Video Tutorial of Editing iTunes M4V Movies with Adobe Premiere
If you are still unclear about how to remove iTunes DRM and import the M4V videos to edit with Adobe Premiere Pro, you can follow the video guide below:
Part 4. Video Tutorial of Editing iTunes M4V Movies with Adobe Premiere
If you are still unclear about how to remove iTunes DRM and import the M4V videos to edit with Adobe Premiere Pro, you can follow the video guide below:


User Comments
Leave a Comment