Hey there! If you've recently joined the Tesla family and are eager to enjoy your favorite Apple Music tracks while driving, you’re in luck. With Tesla's 2022.44.25 Holiday Update, the integration of Apple Music has become a reality, delighting many Tesla owners. Let’s explore the steps and 3 best methods to play Tesla Apple Music.
Part 1. How to Play Apple Music on Tesla with Native App
To start with, ensure your Tesla is equipped with the necessary software update to access the native Apple Music app. Here’s how you can do it:
Step 1. Ensure your Tesla is connected to a reliable WiFi network.
Step 2. Navigate to "Settings > Software" on your Tesla’s touchscreen and check for any available updates.
Step 3. If an update is available, follow the on-screen instructions to install it.
Step 4. Tap the Apple Music icon in the Application Launcher on your Tesla’s touchscreen.
Step 5. A QR code will be displayed. Scan it with your iPhone to log in using your Apple ID.
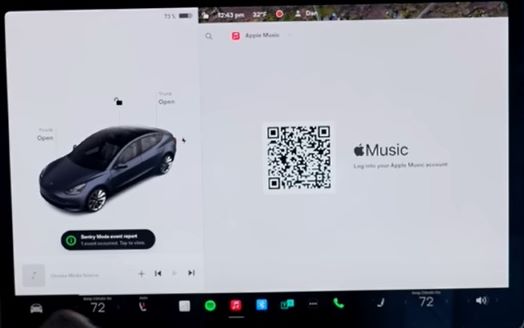
Step 6. Once logged in, you can stream over 100 million songs and 30,000 playlists ad-free directly from your Tesla.
Note:
Tesla uses its own 4G cellular connection to stream music unless it’s connected to WiFi or using your phone as a hotspot.
1.1 Limitations of Apple Music on Tesla
While Apple Music integration in Tesla is great, there are some limitations you should know about:
1. No Lossless or Dolby Atmos Support: You can't listen to high-fidelity audio with Apple Music on Tesla.
2. Explicit Content: Explicit songs are blocked by default, and you'll need to adjust settings to allow them.
3. No Song Downloads: Unlike Tidal, you can't download songs to your Tesla for offline listening.
4. Shuffle Mode Issues: The shuffle feature only works on songs within the current page of a playlist and sometimes skips songs randomly.
5. Re-select Media Source: You often have to reselect Apple Music as the media source when you get back in the car.
6. Login Problems: Switching between media sources may require you to log back in by scanning the QR code again.
7. Interface Issues: The Apple Music interface isn't as user-friendly compared to other services.
8. Playlist Limitations: Large playlists are divided into pages, and you can only shuffle or play songs on the current page.
9. Buffering Problems: The app doesn't buffer the next track, which can cause interruptions.
10. Voice Commands: Using voice commands to play music only displays options on the screen; it doesn't start playing immediately.
11. Loading Issues: If Apple Music keeps loading:
- Sign out and sign back in.
- Turn Apple Music off and on in Audio Settings.
- Ensure Apple Music isn't playing on another device unless you have a family subscription.
- Restart the touchscreen by holding both scroll wheels.
- Switch to Tesla streaming and back.
- Reinstall the Apple Music app from your iPhone.
12. Clean Filters: The app doesn't remember "clean" filters on playlists, so explicit content may play unexpectedly.
For high-quality audio, consider using Tidal, which supports lossless music on Tesla but only with downloaded songs on WiFi.
Part 2. How to Play Apple Music on Tesla via Bluetooth
You can connect your mobile devices to your Tesla media player via Bluetooth to stream your Apple Music to Tesla. Now, let's see the full tutorial below.
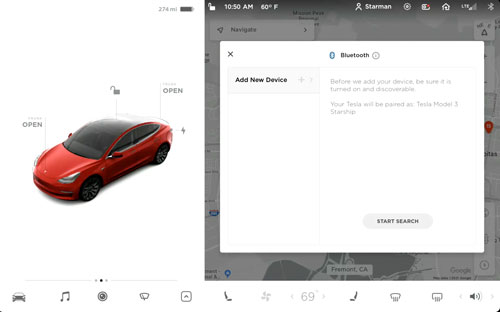
Step 1. Power on both your phone and the touchscreen on Tesla vehicle.
Step 2. Go to your phone and turn on the Bluetooth feature.
Step 3. Head to the touchscreen on Tesla. Then click on "Add New Device" > "Start Search". And then you will see a list of available Bluetooth devices shown on the Bluetooth settings screen.
Step 4. Select your phone from the list. Then you will notice the Bluetooth settings screen and your phone both shows a number.
Step 5. Check the number on your phone to see whether it matches the number on the Bluetooth settings screen. Then confirm and pair your phone to Tesla.
Step 6. Launch the Apple Music app on your phone. Then click on the song you want to stream. After that, you can enjoy Apple Music on Tesla through Bluetooth.
Part 3. How to Play Apple Music on Tesla via USB Drive Offline
By using Bluetooth to connect Tesla Apple Music or the native Apple Music on Tesla, you need to use your cellular data. And you have to use Apple Music in Tesla online all the time. What if you want to use Apple Music and Tesla offline? Is there any way to get Apple Music for Tesla offline?
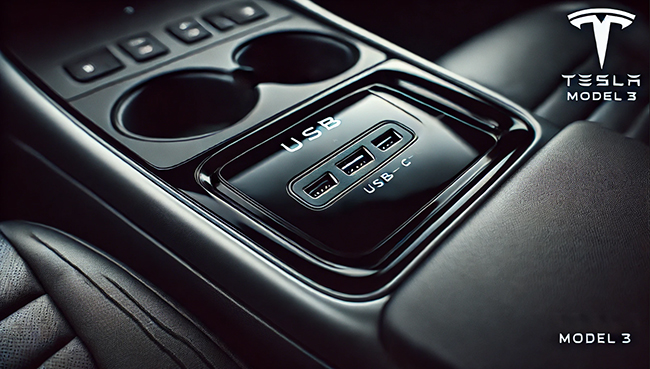
Of course, Tesla vehicle has a USB port which allows users to transfer media files. So, you can save Apple Music to the USB flash drive and then play Apple Music on Tesla via USB drive. Yet, we know that Apple Music is encrypted and can't be put on other devices. So, to make it, you will need to use a Apple Music converter to keep Apple Music as local files.
Here we'd like to recommend the DRmare Apple Music Converter to you. It is a great tool to help decrypt music files from Apple Music to common audio. And it can rip the strict limitations from Apple Music without any effort. Then you will get Apple Music in Tesla supported audio files.
What's more, the DRmare Apple Music Converter can convert and save Apple Music to plain audio formats. They include WAV, MP3, AAC, M4A and more. You can reset them on the DRmare program. Also, you can change the codec, bit rate and so on for Apple Music tracks you like.
Besides, this DRmare program can batch convert Apple Music files with a fast speed. And it can keep the original music quality and full metadata of Apple Music songs. After that, you can move Apple Music to USB stick and play Apple Music on Tesla via the USB drive.

- Choose from various output formats like MP3 and AAC
- Keep high-quality audio and original metadata
- Fast batch conversion at 100x speed
- Play Apple Music on Tesla hassle-free
How to Convert Apple Music for Tesla by DRmare Apple Music Converter
Now, you can follow the steps below and learn how to convert Apple Music for Tesla by DRmare Apple Music Converter. To begin, you have to download your favorite songs from Apple Music first. Also, you need to download and then install the DRmare Apple Music Converter on your Mac or Windows computer.
- Step 1. Add Apple Music files to DRmare
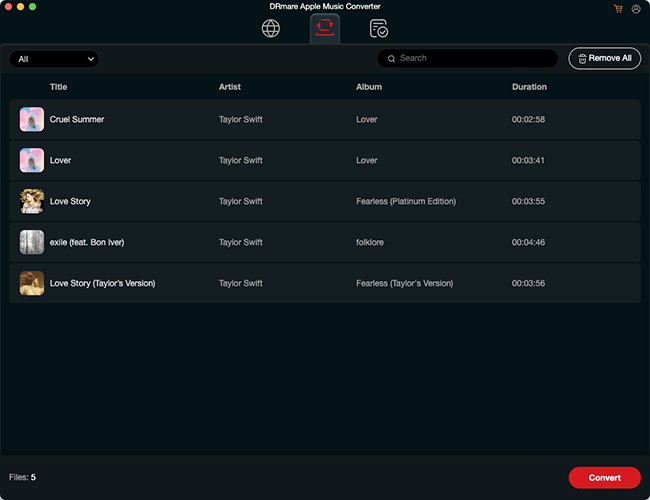
Open the DRmare Apple Music Converter for Windows or Mac you installed according to your computer. Head to the "add files" button on the DRmare program's main screen. It is located at the bottom left corner. Click on it and you will find the downloaded Apple Music files on the target place. Then you can choose the Apple Music songs and add them to DRmare program to convert for Tesla.
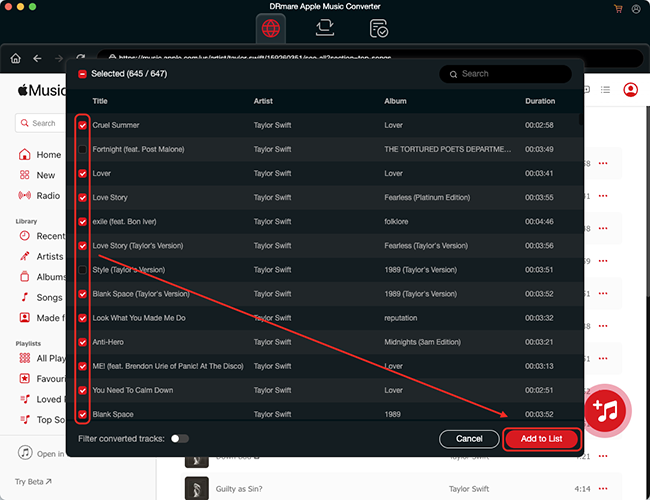
- Step 2. Set output audio format for Apple Music Tesla
Touch the "audio" icon on the main interface of DRmare Apple Music Converter. It will then display a "Format Setting" window. Now, you can step to set the output audio format and so on for Apple Music on Tesla. You can select one of the audio format on DRmare Apple Music Converter for your Apple Music in Tesla you want. And you can adjust the sample rate and more for your Apple Music songs.
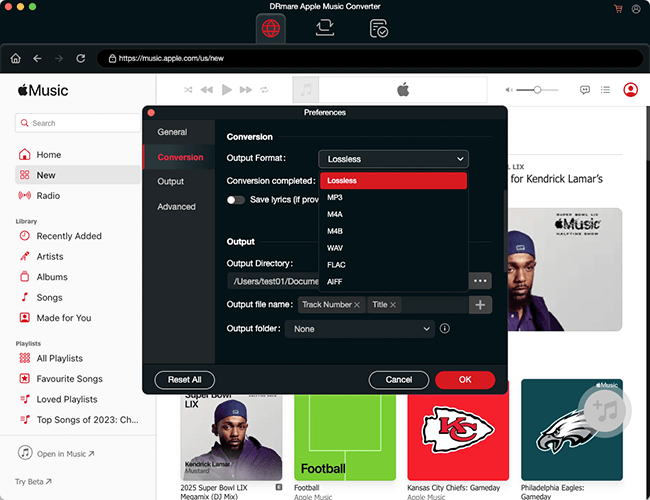
- Step 3. Convert Apple Music for Tesla
Press the "Convert" button to activate the conversion process. The conversion procedure can be seen in the DRmare tools' main window. After the conversion, click on the "converted" icon to visit the local Apple Music songs for Tesla.
- Step 4. How to play Apple Music on Tesla
Here you got the plain Apple Music songs and you are ready to use Tesla Apple Music. Now, we will guide you on how to use Apple Music in Tesla via the USB drive.
- Move the local Apple Music files to the USB drive from your computer.
- Insert the USB stick into the USB port on your Tesla vehicle.
- Click on the "Media Player" > "USB" on the screen.
- Choose and hit on the target folder with the converted Apple Music songs you want to play.
- Now, choose a song and play. Then you can listen to Apple Music on Tesla by the USB drive.
Part 4. Comparison of Different Methods to Play Apple Music on Tesla
Here's a summary table to help you quickly reference how to play Apple Music on your Tesla:
| Method | Ease of Use | Audio Quality | Data Usage | Offline Capability | Special Features |
|---|---|---|---|---|---|
| Native App | Easy | Standard (No Lossless) | Uses Cellular/WiFi | None | Direct integration, Ad-free streaming |
| Bluetooth | Moderate | Compressed Audio | Uses Phone Data | None | Hands-free, works with all media apps |
| USB Drive (Offline) | Moderate | High | None | Full | Play downloaded music, no data needed |
Part 5. FAQs about Playing Apple Music on Tesla
Q1: How to Fix Apple Music on Tesla not working? It does not load.
A1.If Apple Music is not loading, try the following steps:
1. Sign Out and Sign In: Go to the Apple Music app on your Tesla, sign out, and then sign back in.
2. Restart the Touchscreen: Hold down both scroll wheels on the steering wheel until the touchscreen restarts.
3. Switch Media Sources: Go to Audio Settings, turn off Apple Music, and then turn it back on.
Q2: What Music Apps does Tesla support?
A2.Tesla supports several music streaming apps, such as Spotify, Tidal, Apple Music, TuneIn.
Part 6. The Verdict
Here are the ways that you can use Tesla Apple Music. You can use it via native Apple Music app on Tesla, Bluetooth or USB flash drive. If you can’t live with the limitations of Apple Music on Tesla, and prefer a more stable way to enjoy Apple Music on Tesla, you can save Apple Music to USB drive after converting Apple Music by the DRmare Apple Music Converter and listen to Apple Music on your Tesla Model offline.


User Comments
Leave a Comment