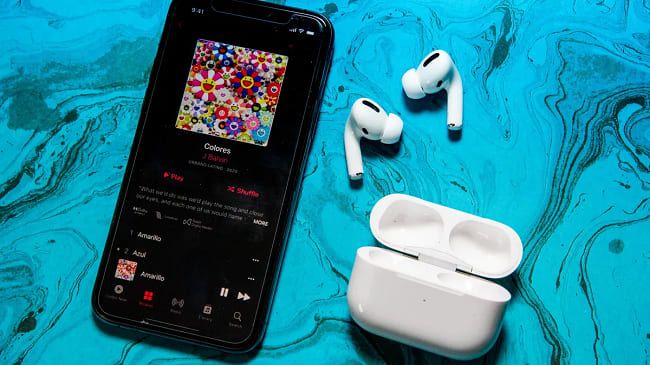
Apple Music, with its vast library and personalized playlists, has become a staple for music lovers worldwide. However, you may find yourself needing to reset your Apple Music account due to technical glitches, a desire to start fresh, or to improve app performance. How to reset Apple Music settings? This guide will walk you through the process of resetting your Apple Music account, ensuring you can continue to enjoy your music without interruption.
Part 1. Preparing to Reset Your Apple Music Account
Before you proceed with a reset, it’s important to back up your data: Be aware that resetting your account might lead to the loss of some data, so ensure all critical data is backed up.
Use iCloud or your local storage to save your playlists. This can be done through the settings in your Apple Music app.
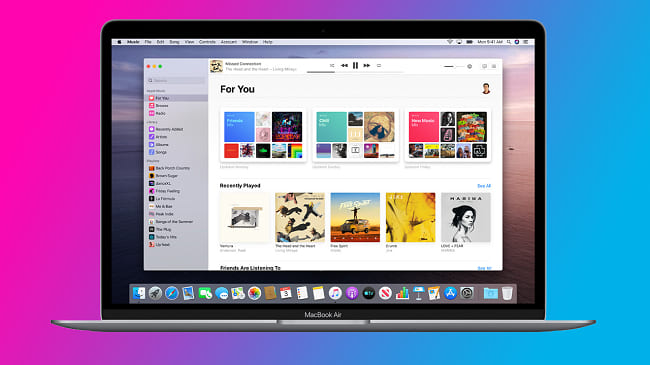
Part 2. Step-by-Step Guide to Resetting Apple Music
The operations below aim to optimize storage and organize media files efficiently on different devices. By following these, you can enhance the performance of your devices and customize your listening experience.
How to Reset Apple Music on iPhone/iPad
The following guide shows us how to manage and free up storage space on your iPhone or iPad by removing all songs stored within the Music app. If you are running low on device storage or want to clear out old or unwanted music to make room for new content, this can be particularly useful.
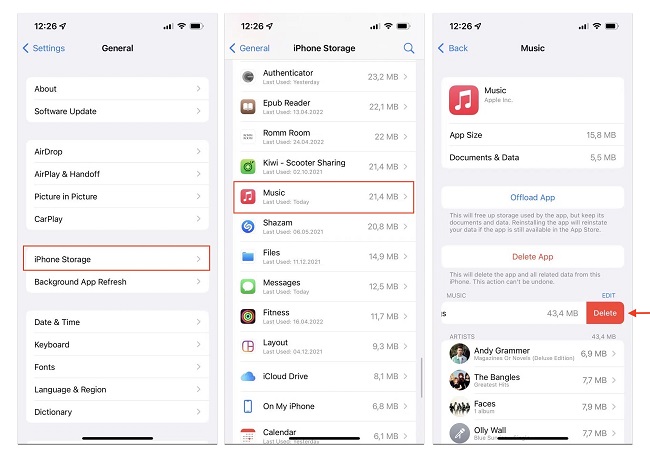
Step 1. Begin by opening the "Settings" app on your iPhone or iPad.
Step 2. Navigate to the "General" section, then tap on "iPhone Storage" or "iPad Storage" depending on your device.
Step 3. In the storage list, scroll down and select the "Music" app to view its detailed storage information.
Step 4. Within the Music storage details, locate the entry labeled "All Songs." Swipe left on the "All Songs" line to reveal the delete option, then tap on "Delete" to remove all songs stored on your device.
How to Reset Apple Music on Android
These steps involve navigating the app to reach and modify your account settings, specifically targeting how the app curates music according to your tastes. By resetting these preferences, you're able to start fresh, potentially exploring new genres and artists that better suit your current musical interests.

Step 1. Launch the Apple Music app. You can find this icon on one of your Home screens.
Step 2. Once the app is open, tap on “the three dots” located in the upper right corner of the screen.
Step 3. If you are already signed into your account, tap on "Account." If not, you'll see an option for "Settings" instead; tap on it to sign in.

Step 4. After accessing your account, select "View" which may require scrolling down on your profile page to find.
Step 5. In the account menu, choose "Choose Artists For You," typically the first option in the list.You will then be taken to a page displaying bubbles that represent your current listening habits.
Step 6. To reset, tap on the "Reset" option. This action will clear all your selected music genres and reset your preferences, allowing you to start afresh with your music discovery.
How to Reset Apple Music on Mac
These operations effectively reset the music library and free up space on your Mac, helping you manage and customize your digital music environment.
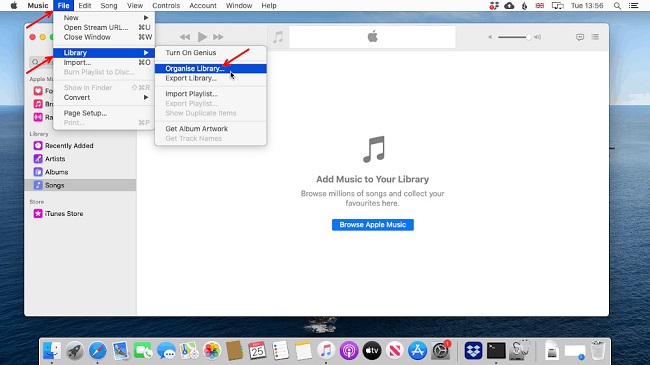
Step 1. Start by launching the Music app on your Mac.
Step 2. Navigate to the menu bar, click on "File", then hover over "Library" and select "Organize Library" from the dropdown menu.
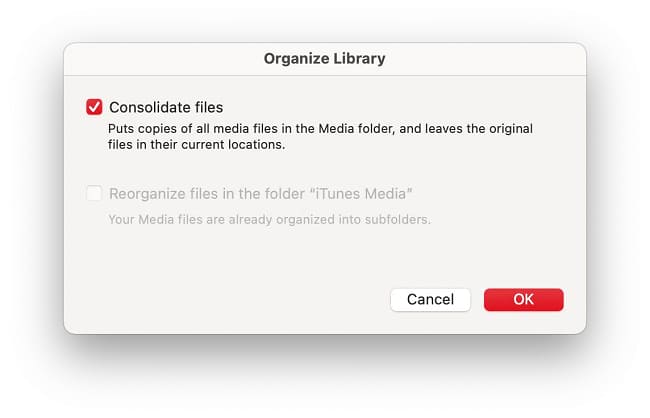
Step 3. The dialog box that appears, check the box next to "Consolidate Library" and click "OK". This will merge all files in your Music Library into a single folder.
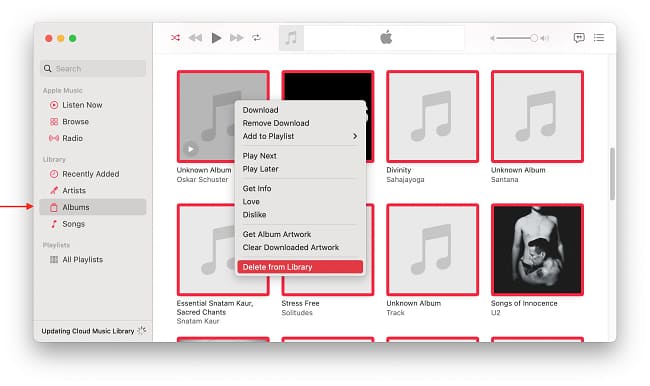
Step 4. Go to the "Albums" section in the sidebar and press "Cmd+A" to select all the files within the album. Then right-click on any selected file and choose "Delete from Library" from the context menu.
How to Reset Apple Music on Windows
These following operations are to manage and possibly clear the media folder's settings and optimize the app's file storage settings within the Apple Music app.
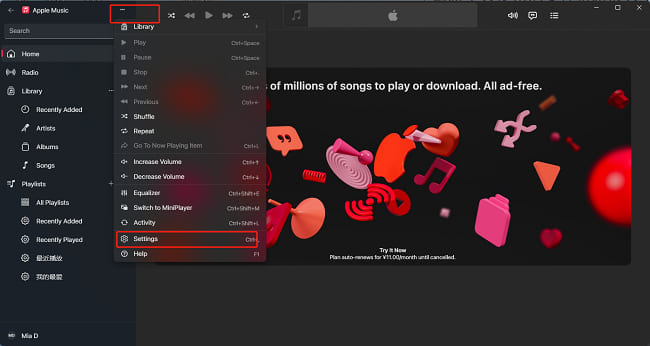
Step 1. Start by launching the Apple Music app on your Windows. Hover over "Three dots" and select "Settings" from the dropdown menu.
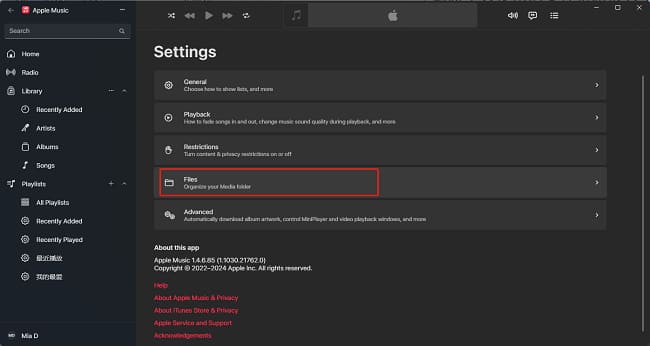
Step 2. Click on "Flies" in the Settings page.
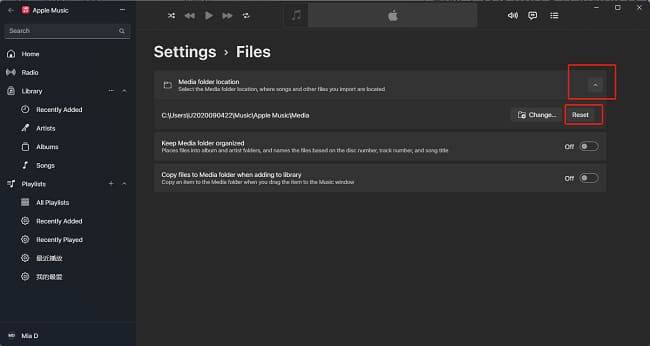
Step 3. Click the "Media folder location" and select "Reset" from the dropdown menu.
After resetting, you may restore your previously backed-up playlists by re-importing them into Apple Music. Re-customize your settings to regain your personalized music recommendations.
Part 3. Tips: How to Reset Apple Music Recommendation
When you first install Apple Music on any device, you participate in a brief setup where you indicate your musical preferences. Based on this information, along with the songs you listen to from the Apple Music catalog and your indicated likes and dislikes, the app generates personalized song recommendations. Previously, in iTunes, there was a direct feature to reset these recommendations. However, this feature was removed in the subsequent Music app. To attempt a reset now, you can follow these steps:
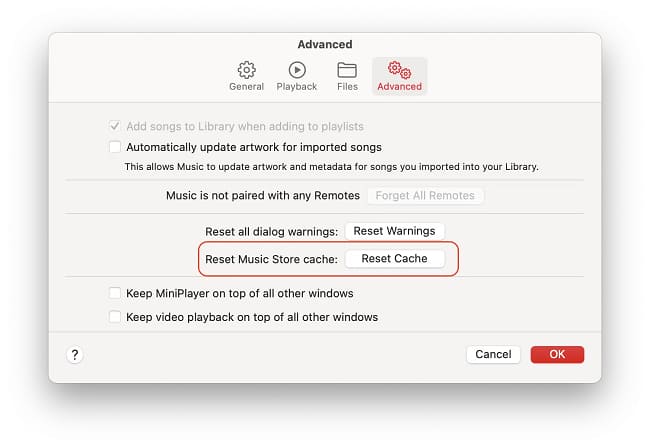
Step 1. Open the Music app on your Mac and navigate to the Music menu and select 'Settings'.
Step 2. Switch to the 'Advanced' tab and click on 'Reset Cache'.
Part 4. FAQ
Q1. What happens when I reset my Apple Music library?
A1. Resetting your Apple Music library removes all songs, albums, and playlists that you have added or downloaded to your account. This action does not cancel your subscription but effectively gives you a clean slate to start from in terms of content.
Q2. Can I recover my music after resetting my Apple Music library?
A2. If you have backup copies of your music or playlists, or if you've used iCloud Music Library, you can recover your music by re-enabling Sync Library on your devices. Otherwise, manually added music that was not purchased through iTunes will need to be re-added.
Q3. Does resetting my Apple Music preferences affect all my devices?
A3. Yes, if you are using the same Apple ID and have Sync Library turned on, resetting preferences will affect all devices that are logged into your Apple ID and have Apple Music configured.
Q4. How long does it take for Apple Music to refresh my recommendations after a reset?
A4. A: The time it takes for new recommendations to appear can vary. Generally, you should start seeing new recommendations based on your new listening habits within a few weeks of active use.
Part 5. Resetting Your Apple Music Without Worrying about Losing Your Music
Resetting Apple Music sometimes can be risking as it leads to the loss of curated playlists, downloaded songs, and personalized recommendations. Thanks to DRmare Apple Music Converter, this powerful tool lets you convert and save your favorite tracks in formats like MP3, AAC, FLAC, and more. With DRmare, you can protect your music before a reset and enjoy it offline on any device. This feature is crucial for those who want to refresh their Apple Music experience or start with a new library without losing personalized playlists and downloaded songs.
Additionally, DRmare Apple Music Converter can easily remove protection from Apple Music, iTunes and Audible. The process is very fast, up to 30 times faster. It maintains lossless sound quality and complete ID3 tags such as title, album cover, etc. You can even customize output audio parameters, including channels, bitrate, sample rate, and more. With it, you can easily get DRM-free Apple Music, iTunes or Audible audio files. You can then upload these files to iMovie for use.

- Remove DRM protection from Apple Music, iTunes, and Audible
- Convert music files to DRM-free MP3, AAC, WAV, FLAC, etc.
- Ensure lossless sound quality and metadata information
- Run at 30X faster speed, support batch conversion
Part 6. Conclusion
Overall, resetting your Apple Music account is primarily useful for troubleshooting or refreshing your library and settings. Before resetting, it’s crucial to back up your content and settings to avoid loss. After resetting, actively engage with Apple Music by liking or disliking songs to refine future recommendations. If issues persist or the reset process is challenging, contact Apple Support for assistance and to enhance your listening experience.


User Comments
Leave a Comment