-- From discussion.apple.com
GarageBand is a powerful music creator that lets you compose, mix, record, and share music. It is available for Mac, iOS, and iPad devices. You are in the right place if you encounter the error message "Protected songs can not be imported" in GarageBand. This post will explain why and walk you through the steps to add iTunes songs and Apple Music to GarageBand on Mac, iPhone, and iPad.
Part 1. Why Does GarageBand Say Protected Songs Cannot Be Imported?
GarageBand is a versatile digital audio workstation (DAW) for creating music or podcasts on Apple devices. GarageBand allows you to upload files encoded in MP3, AAC, WAV, CAF, AIFF, and Apple Loops. But it only supports unprotected files.
However, Apple Music tracks are protected in a special M4P audio format, which prevents direct usage in third-party applications like GarageBand. This is the key reason why GarageBand shows an error message.
To add and use Apple Music in GarageBand, you must convert the protected tracks to a format that GarageBand can import, such as MP3 or WAV with the help of a third-party program, like DRmare Apple Music Converter.
Note:
Unlike Apple Music, songs purchased from iTunes files are not protected and saved in AAC format. That is to say, you can add and edit iTunes songs in GarageBand directly.
| Platform | Supported Audio Format |
|---|---|
| GarageBand | AAC, AIFF, Apple Loops, MP3, and WAV |
| Apple Music | Protected M4P |
| iTunes Songs | Unprotected AAC |
| DRmare Apple Music Converter | MP3, AAC, WAV, M4A, M4B, and FLAC |
Part 2. How to Add an iTunes Song to GarageBand on Mac/iPhone/iPad
If the songs are purchased from iTunes or uploaded from your local computer to this library, you can directly add a song from iTunes to GarageBand on Mac, iPhone, and iPad. Now, follow the steps below to get iTunes songs into GarageBand for remixing or editing.
How to Add iTunes Music to GarageBand on iPhone/iPad
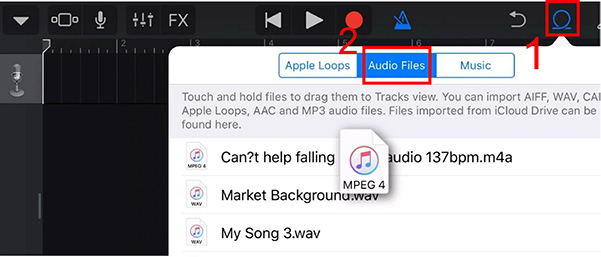
Step 1. Open GarageBand on your iPhone or iPad, open the project you want to add the iTunes song to, or create a new project.
Step 2. Tap the "Loop" icon (it looks like a loop of wire) in the upper-right corner. This opens the Loop Browser.
Step 3. Tap "Audio Files" at the top of the Loop Browser to browse files stored on your device. Make sure the song you want to import is stored in a compatible format in the Files app.
Step 4. Find the iTunes song you want to add and tap on it. The song will be imported into GarageBand. Now, you can drag iTunes songs to GarageBand timeline for use.
How to Import Songs from iTunes to GarageBand on Mac
Step 1. Launch GarageBand on your Mac and open or create the GarageBand project that you'd like to add iTunes music.
Step 2. Click on the "View" menu and select "Show Media Browser" or press Cmd+1. This will open the Media Browser where you can access your iTunes library.
Step 3. In the Media Browser, click on the "Audio" tab. Then, navigate to "iTunes" to browse your iTunes library and find the song you want to add.
Step 4. Select and put iTunes songs on GarageBand. You can search for iTunes songs by name, or browse by album, artist, genre, or playlist. To preview a song, tap it in the list. You can control the preview volume with the slider at the bottom of the list.
Step 5. Drag iTunes songs into the timeline of your GarageBand project. Align the left edge of the song with the bar or beat on the ruler where you want it to start playing.
Part 3. Tool Required to Add Apple Music to GarageBand
Since Apple Music songs are protected and encoded in M4P format, they are not directly compatible with GarageBand, which only supports MP3, AAC, WAV, AIFF, and Apple Loops. To use Apple Music tracks in GarageBand, you need to remove the protection and convert the songs to a compatible format.
The DRmare Apple Music Converter is an excellent solution for this task. It is an all-in-one audio converter that gets rid of protection from Apple Music, iTunes songs, Audible books, and more. With its 30X faster conversion speed, you can quickly convert your Apple Music tracks to GarageBand-supported formats, like WAV, MP3, etc. with lossless sound quality. Once converted, you can easily get a song from Apple Music to GarageBand and other music editing software without any issues.

- Batch convert Apple Music and add Apple Music to video with ease
- Work at a 30X faster speed with zero quality loss after conversion
- Keep and edit ID3 tags including album art, title, etc.
- Use Apple Music in GarageBand, iMovie, and other editing software
How to Convert Apple Music for GarageBand
Please install DRmare Apple Music Converter to your computer in advance and download the Apple Music songs on PC. Then you can follow the steps below to convert protected Apple Music songs to GarageBand-compatible files.
- Step 1Import downloaded Apple Music M4P songs
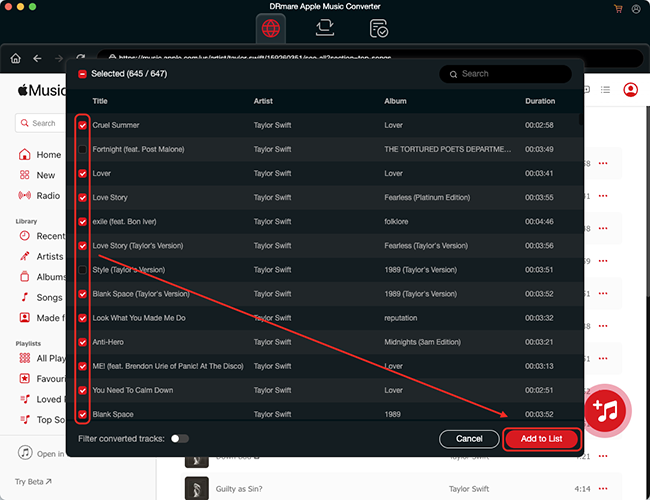
- Open the installed DRmare Apple Music Converter. Click the 'Load iTunes Library' button at the bottom left corner. This will display your iTunes library. Select the Apple Music songs you want to edit in GarageBand. DRmare Apple Music Converter will load the selected songs for conversion immediately.
- Step 2Choose Apple Music audio format for GarageBand
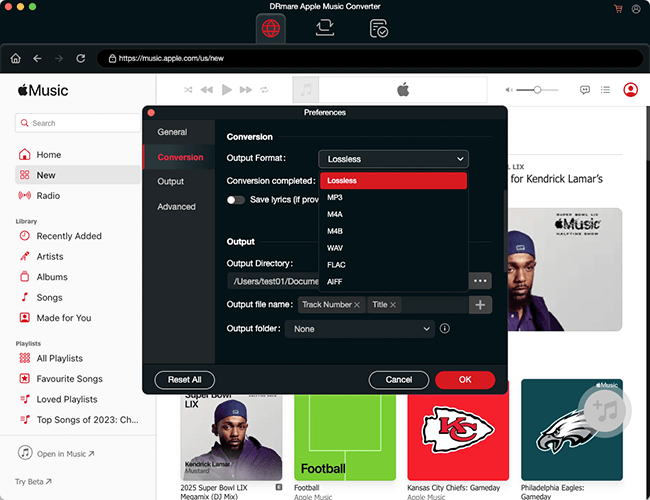
- GarageBand supports MP3, AAC, WAV, AIFF, and Apple Loops, so you can choose an output format from these options. The default output format is MP3, which is compatible with most devices and platforms. To personalize your songs further, you can customize additional parameters such as audio codecs, channels, sample rates, and bit rates. Simply click the 'Audio' icon next to the 'Convert' button to access these settings.
- Step 3Convert Apple Music for Using in GarageBand
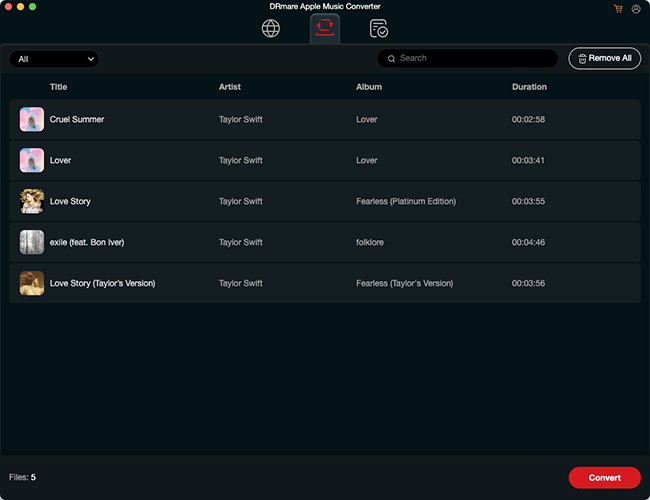
- Click the 'Convert' button at the bottom right corner. With just one click, all imported Apple Music songs will be converted at 30X faster speed. Once converted, you will have unprotected local files on your computer. You can find and listen to Apple Music offline by clicking on the 'Converted' folder. Alternatively, you can access the 'History' list, indicated by a red spot, to play Apple Music directly within the software. Now you are ready to add Apple Music songs to GarageBand without any restrictions.
Part 4. How to Import Apple Music to GarageBand on Mac/iPhone/iPad
Now you have stored Apple Music files on your computer and they are compatible with GarageBand. You can easily use them on GarageBand. Here's a guide on how to import songs from Apple Music into GarageBand on Mac, iPhone and iPad .
How to Add Music from Apple Music to GarageBand on Mac
Step 1. Launch GarageBand on Mac, and you will see its main screen.
Step 2. From the top menu, please click 'File' > 'iCloud'. Then you can select 'Import GarageBand for iOS' or 'Import Music Memos File'.
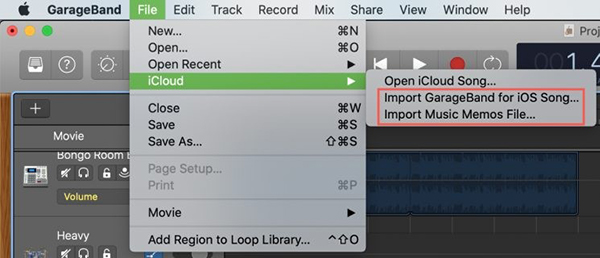
Step 3. Then just select the unprotected Apple Music tracks and add them to GarageBand.
Note:
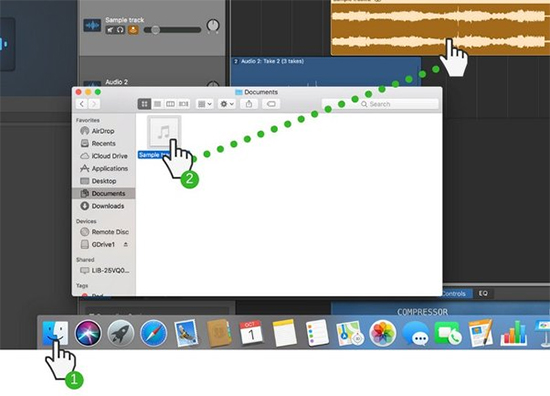
'Import Music Memo Files' is only available for Apple Music M4A files. For MP3 files, simply find the 'Converted' Apple Music folder on the Finder, then drag and drop them onto GarageBand's editing screen.
How to Put Apple Music on GarageBand on iPhone/iPad
GarageBand mobile applications can work on iPhone and iPad devices. To add songs from Apple Music to GarageBand, you have to sync Apple Music to your iPhone or iPad first. Below is how to add music to GarageBand from Apple Music.
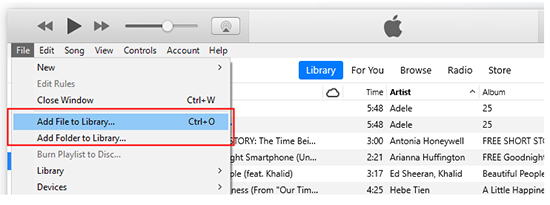
Step 1. Open iTunes on your Mac computer. Hit the 'Menu' bar > 'File' > 'Add File to Library' to upload unprotected Apple Music to your iTunes Library.
Note:
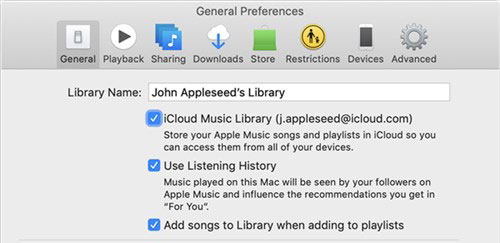
Please turn on 'iCloud Music Library' by clicking 'Edit' > 'Preferences' > 'General' tab. Then the songs can be accessed from any Apple device. Also, make sure you check the box of the 'iCloud Music Library" on your iPhone and iPad.
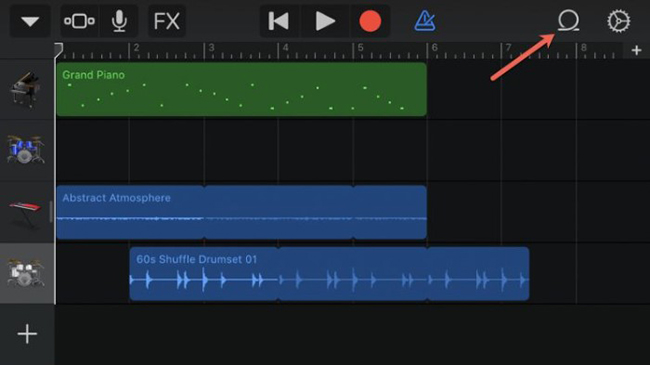
Step 2. Launch GarageBand on iPhone or iPad. And then click the 'Loop' icon at the top right.
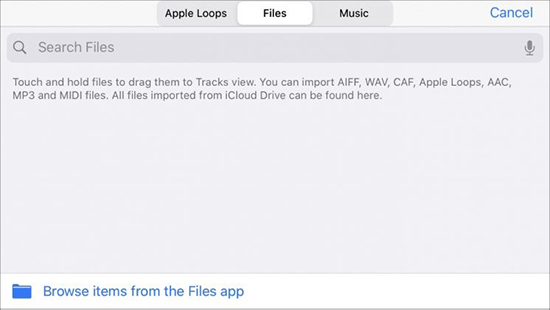
Step 3. Hit on 'Files' or 'Music' and then browse and add songs from Apple Music to GarageBand.
If you want a visual guide, you can watch the following video on YouTube, which provides step-by-step instructions to add songs from Apple Music to GarageBand.
YouTube Video: How to Add Apple Music to GarageBand
Part 5. How to Use iTunes Songs/Apple Music in GarageBand
GarageBand is a powerful tool for music creation and editing, suitable for both beginners and seasoned musicians. GarageBand offers a range of features to create remixes or compose your music. Now, let's see how to use iTunes songs and Apple Music in GarageBand effectively.
How to Edit Apple Music Songs on GarageBand
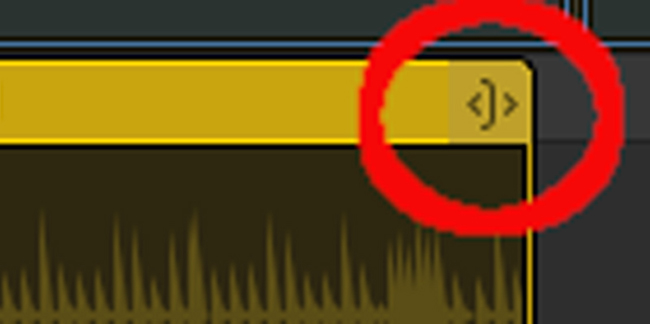
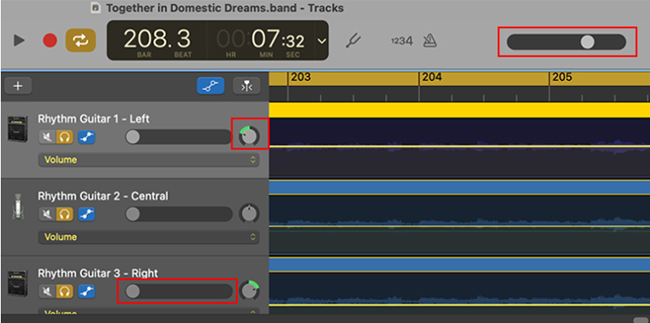
1. Trim and Split Apple Music: You can trim or split your Apple Music clip to fit your project. To trim, click and drag the edges of the clip in the timeline. To split, position the playhead where you want to make the cut and press Command + T.
2. Adjust Volume and Panning: Each Apple Music track has its own volume and panning controls. Use the volume slider on the track header or the mixer section to adjust the volume. To adjust the stereo balance, use the panning knob.
3. Add Audio Effects: Enhance your track with effects. Select the track, then open Smart Controls by pressing B. Here, you can add and adjust effects like EQ, reverb, and compression to shape the sound of your track.
4. Arrange Apple Music in Your Project: Drag and move clips in the timeline to arrange your music as desired. You can layer multiple tracks, create loops, and experiment with different arrangements to enhance your project.
Tips of Using Music in GarageBand:
- Organize Your Files: Keep your music files and GarageBand project files organized to streamline your workflow.
- Use High-Quality Files: For the best results, use high-quality audio files to avoid degradation in sound quality.
- Experiment with Effects: Don't be afraid to experiment with different effects and settings to find the perfect sound for your project.
Part 6. More Tips: How to Add GarageBand Song to Apple Music
If you've created a masterpiece in GarageBand and want to share it with the world, you might be wondering how to add it to Apple Music. Luckily, it's a straightforward process that can be done directly from the GarageBand app on your Mac or iOS device
Step 1. Open GarageBand on your Mac and switch to the My Songs view.
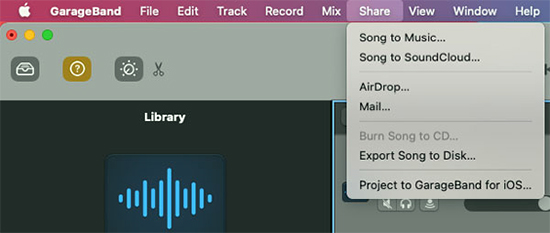
Step 2. Select the song you want to share and click on "Share" in the menu bar.
Step 3. Choose "Song to Music" from the Share options.
Step 4. In the Share dialog, you can rename the shared file if you want to.
Step 5. By default, the entire song is shared, but you can choose to share only the cycle area or selected regions by selecting the "Export cycle area only, or length of selected regions" checkbox.
Step 6. Click "Share" to share the song to the Music app.
Step 7. The shared song will appear in the Music app, where you can add it to playlists or sync it to an iPhone or iPad.
Part 7. The Verdict
Adding songs from iTunes and Apple Music to GarageBand can enhance your music-making experience, giving you access to a vast library of high-quality tracks. Since Apple Music tracks are protected, you'll need to use DRmare Apple Music Converter to remove the protection and convert the formats. Fortunately, the process is simple.
By the way, you can now add Apple Music not only to GarageBand but to any other video editing software as well! Now it's time to open up new creative possibilities with your Apple Music library.





User Comments
Leave a Comment