Ableton Live is widely recognized as a top-tier tool for both music production and live performance. However, importing Apple Music to Ableton Live can be a multi-step process due to the digital rights management (DRM) associated with Apple Music. But no worry! This guide will walk you through the best method to DJ with Apple Music in Ableton Live.
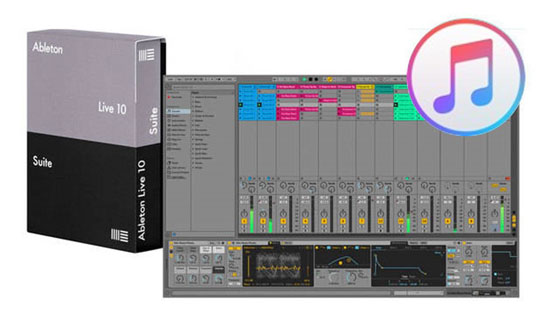
Part 1. Why You Can't Import Apple Music to Ableton Live?
Ableton Live is more than just powerful DJ software; it's an all-in-one music production suite. It's perfect for live performances, giving users extensive turntable-producer-like controls, like crossfading and adding effects. However, it doesn't integrate with Apple Music directly.
While Ableton Live supports a variety of audio formats including WAV, AIFF, MP3, AAC, Ogg Vorbis, and FLAC, it can't read Apple Music tracks. Apple Music, as a streaming subscription service, uses DRM to protect its files. This copy protection prevents the files from being used outside of the Apple Music ecosystem, which is why Ableton cannot import them.
Even if you download an Apple Music track, it's still a protected file, not a standard, open audio file like a WAV or MP3. Besides, simply trying to "convert" them within iTunes or the Apple Music app won't remove this DRM. To use Apple Music with Ableton Live, you must use a third-party tool, like DRmare Apple Music Converter, specifically designed to convert DRM-protected audio into an unprotected format Ableton supports.
| Platforms | Supported Audio Formats |
|---|---|
| Ableton Live 12/11/10 | MP3, WAV, AIFF, AAC, Ogg Vorbis, FLAC |
| Apple Music | Protected M4P |
| iTunes Purchases | Unprotected AAC |
| DRmare Apple Music Converter | MP3, WAV, AIFF, FLAC, M4A, M4B |
Tips:
If you want to use a specific track in Ableton Live, you can purchase a digital copy from iTunes Store. Recent iTunes purchases are generally DRM-free and can be imported directly. it's worth mentioning that early purchases were often in a "Protected AAC" format, which also has DRM.
Part 2. How to Convert Apple Music to Ableton Live-compatible Files
Since you can't directly insert Apple Music into Ableton Live, you have to convert the file into an unprotected audio format that Ableton can recognize. DRmare Apple Music Converter is specifically designed for this purpose. It works by downloading Apple Music songs as local files, and can convert them to various formats that are compatible with Ableton Live, such as MP3, FLAC, WAV, and AIFF.
The software is capable of preserving 100% of the original audio quality and keeps important metadata like titles, artists, and album art. A key feature is the ability to download entire Apple Music playlists at once at 30X faster speed, regardless of how many tracks they contain, saving you a lot of time and effort compared to manually re-adding and converting individual songs. This allows you to quickly download your existing Apple Music playlists to your computer with just a few clicks.
How to Download Apple Music for Ableton Live
- Step 1Log into account and add Apple Music to convert
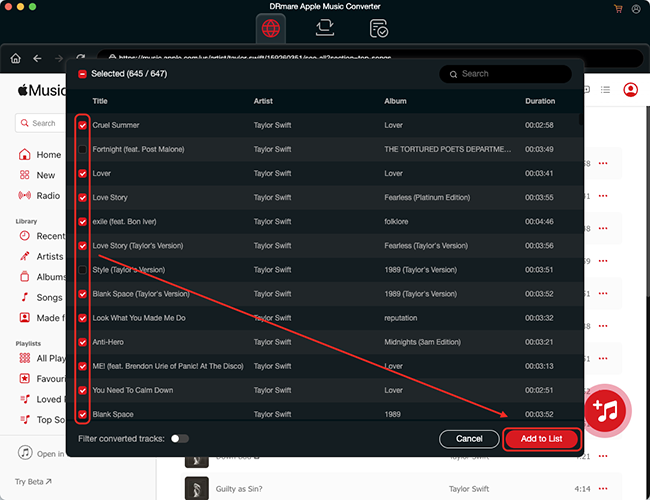
Download and launch DRmare Apple Music Converter on your desktop and log in to your Apple Music account through its built-in web player by clicking the "Sign In" button. Now, you can browse your Apple Music library and click the "Add" > "Add to List" button to load them for conversion.
- Step 2Edit Apple Music output settings for Ableton Live
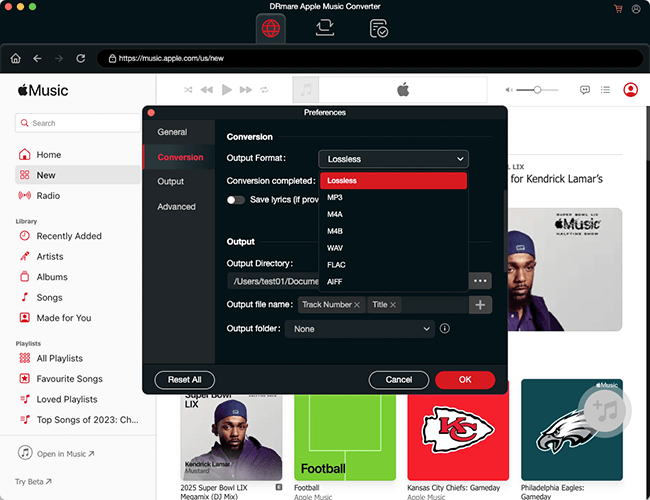
For Mac users, open Mac's menu bar and select the "DRmare Apple Music Converter". For Windows users, go to the right side of the main window and click the "menu" icon. Then you can choose "Preferences" > "Conversion" option to customize the Apple Music output parameters as you need.
Tips:
To make Apple music better usable on Ableton, you can choose output format to WAV or FLAC, sample rate to 48000Hz, bitrate to 512kbps.
- Step 3Covert Apple Music Songs for Ableton Live
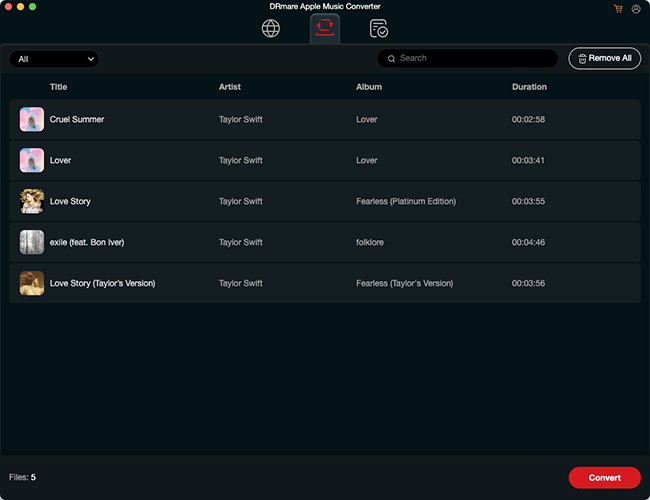
Now simply click onto the big "Convert" icon to begin conversion process. The converting time is based on the number of music in the playlist. When the task is accomplished, a red spot will appear the "Converted" section. Check it and click the "folder" icon to locate the "Converted" folder where all selected Apple Music tracks kept.
Part 3. How to Import Converted Apple Music into Ableton Live
Once you have the converted, unprotected Apple Music files saved on your computer, you can import them into your Ableton Live project for remixing. This is a straightforward process:
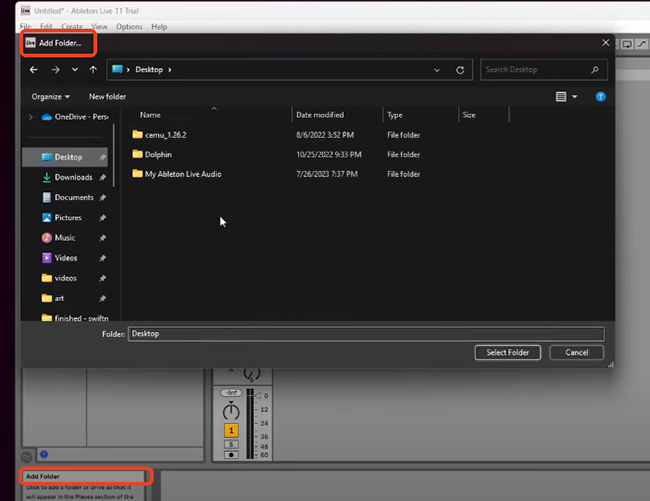
Step 1. Open Ableton Live 12, 11 or 10 on your computer and go to the "Places" section of the browser on the left-hand side.
Step 2. Click "Add Folder" and select the music folder where your converted Apple Music files are stored. This will make the folder accessible directly within Ableton's browser.
Step 3. Navigate to the Apple Music folder you just added. Drag and drop the audio files you want to use from the browser into an audio track in your Ableton Live Arrangement or Session View. If you meet some problems in this step, please refer to this Ableton Q&A.
Tips:
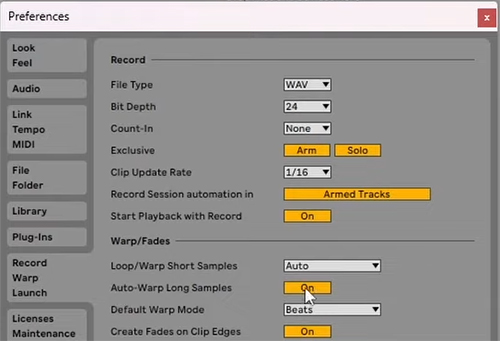
Before importing, it's also a good practice to adjust Ableton's warp settings to prevent the software from automatically altering the tempo of your imported audio. In the "Preferences" menu, under "Record Warp Launch," you can set "Auto-Warp Long Samples" to "Off."
Part 4. In Conclusion
The challenge of using Apple Music with Ableton Live is a common one, but it's easily solved. By understanding that the core issue is Digital Rights Management (DRM) and not a simple format mismatch, you can choose the right approach.
Using DRmare Apple Music Converter allows you to efficiently convert your protected Apple Music tracks into MP3 or other Ableton-supported files. Once converted, these Apple Music files are ready to be seamlessly integrated into your Ableton Live 12 projects, giving you full creative freedom for DJing, sampling, and production.


User Comments
Leave a Comment